
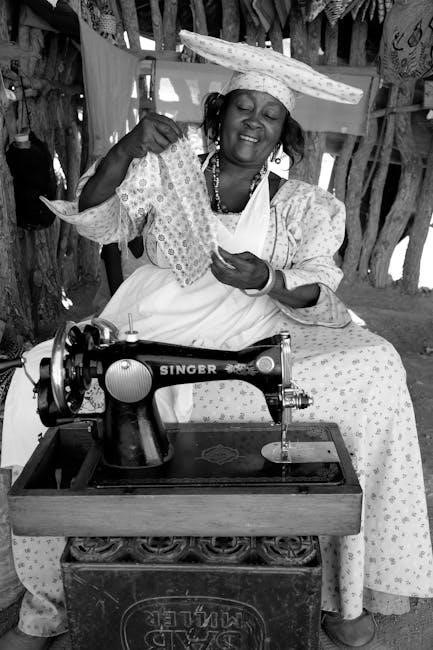
Singer Serger Manual: A Comprehensive Guide
Singer serger machines offer diverse models, from domestic to industrial, requiring detailed guidance. This manual provides comprehensive support for threading, maintenance, and troubleshooting.
Explore Singer’s range, including the HD0405S, SE017 Elite, and combo units, alongside industrial options like the 20G and 712G.
Understanding vintage models and locating online resources are also covered, ensuring a seamless serging experience for all users.
Singer sergers, also known as overlock machines, represent a cornerstone of modern sewing, offering professional-quality finishing for fabric edges. These versatile machines excel at simultaneously sewing, trimming, and overcasting, preventing fraying and creating durable seams. Singer provides a broad spectrum of serger models, catering to both beginner and experienced sewists, encompassing both domestic and industrial applications.
From the robust Singer Heavy Duty HD0405S to the feature-rich SE017 Elite and convenient combo units, Singer sergers streamline garment construction and crafting projects. Understanding the core functions and capabilities of these machines is crucial for achieving optimal results. This guide will delve into the intricacies of Singer sergers, empowering you to unlock their full potential.
Understanding Serger Functions

Singer sergers perform three essential functions simultaneously: sewing, trimming, and overcasting. The needles create a seam, the built-in knife trims excess fabric, and the loopers interlock threads to encase the raw edge, preventing fraying. This process yields a professional, clean finish significantly faster than traditional sewing methods.
Sergers utilize loopers instead of a bobbin, creating a more durable and flexible seam. Different threading configurations – 3-thread or 4-thread – offer varying seam widths and strengths. Mastering these functions allows for diverse applications, from garment construction to decorative edging, enhancing project quality and efficiency.
Types of Singer Sergers
Singer offers a diverse range of sergers catering to various skill levels and needs. The Singer Heavy Duty HD0405S Overlocker is a popular choice for beginners, known for its ease of use and durability. The Singer SE017 Elite Overlocker provides more advanced features and stitch options for experienced sewers.
For ultimate versatility, the Singer Heavy Duty Sewing Machine and Overlocker Combo combines both functionalities in one machine. Beyond domestic models, Singer also manufactures industrial sergers like the 20G and 712G, designed for high-volume production and demanding applications.
Singer Heavy Duty HD0405S Overlocker
The Singer Heavy Duty HD0405S Overlocker is a robust and reliable machine, ideal for beginners venturing into serging. It’s designed to handle a variety of fabrics, from lightweight knits to heavier denim, with consistent stitch quality. This model simplifies the serging process with color-coded threading guides, making setup less daunting.
Key features include adjustable stitch length and width, allowing for customization based on project requirements. Its durable metal frame ensures stability during operation, while the two-needle, four-thread capability creates professional-looking seams. Regular maintenance, like cleaning and oiling, will maximize its lifespan.
Singer SE017 Elite Overlocker
The Singer SE017 Elite Overlocker represents a step up in features and performance, catering to more experienced sewers. It boasts a wider range of stitch options, including flatlock, rolled hem, and differential feed adjustments for enhanced fabric control. This model excels at creating professional finishes on garments and home décor projects.
Its automatic tension system simplifies threading and ensures balanced stitches, even with varying fabric weights. The bright LED lighting illuminates the sewing area, improving visibility. Regular cleaning and proper looper maintenance are crucial for optimal performance and longevity of this elite serger.
Singer Heavy Duty Sewing Machine and Overlocker Combo
The Singer Heavy Duty Combo machine offers versatility, integrating a traditional sewing machine with an overlocker function in a single unit. This is ideal for sewers with limited space or those seeking an all-in-one solution. While convenient, understanding the switching mechanisms between sewing and serging modes is essential for proper operation.
The combo machine typically features a robust motor capable of handling heavier fabrics. Regular maintenance, including needle and looper replacements, is vital. Familiarize yourself with the specific threading diagrams for both sewing and overlocking to avoid issues and achieve professional results.
Serger Parts and Their Functions
Singer sergers comprise several key components working in harmony. Needles create the initial stitch formation, requiring correct type selection based on fabric weight. Loopers – upper and lower – interlock the threads, forming the overlock stitch. Understanding their individual roles is crucial for troubleshooting.
Presser feet dictate fabric feed and stitch type; various feet exist for rolled hems, flatlocking, and decorative serging. Regular inspection and replacement of worn parts, particularly needles and loopers, are essential for consistent stitch quality and preventing damage to the machine.
Needles: Types and Replacement
Singer serger needles are crucial for stitch formation and come in various types – universal, ballpoint, and stretch – suited to different fabrics. Universal needles work well on woven fabrics, ballpoint for knits, and stretch for highly elastic materials. Selecting the correct needle prevents skipped stitches and fabric damage.
Replacement is vital when needles become bent, dull, or damaged. Always use the correct size and type specified in your serger manual. Replace needles in pairs to ensure even stitch quality. A blunt needle can cause fabric puckering and thread breakage, impacting the final project.
Loopers: Upper and Lower

Singer sergers utilize upper and lower loopers, working in coordination to create overlock stitches. The lower looper forms the stitch, while the upper looper interlocks with it, securing the fabric edge. Understanding their function is key to successful serging and troubleshooting.
Proper looper timing is essential; misalignment can cause looping or skipped stitches. Regularly inspect loopers for damage or buildup. Cleaning them with a small brush removes lint and thread fragments. When re-threading, ensure correct placement and tension for optimal stitch formation and fabric finishing.
Presser Feet for Singer Sergers
Singer sergers benefit from a variety of presser feet, each designed for specific techniques. The standard presser foot is ideal for general overlocking, while a narrow foot excels at creating rolled hems. A blind hem foot allows for invisible hemming, and a gathering foot produces beautiful ruffles.
Specialty feet, like the ribbon foot, add decorative elements. Correct foot selection impacts stitch quality and fabric handling. Ensure the foot is securely attached before serging. Regularly clean feet to prevent lint buildup, maintaining smooth fabric feed and consistent stitch results.
Threading a Singer Serger
Singer serger threading requires precision for optimal performance. Always refer to your specific model’s manual, as threading paths vary. Begin by raising the presser foot and following the numbered guides indicated on the machine. Ensure threads are properly seated in tension discs for balanced stitches.
Proper threading prevents skipped stitches and broken threads. Different serger configurations—3-thread or 4-thread—demand unique threading sequences. Practice makes perfect; take your time and double-check each step. Consistent, correct threading is fundamental to successful serging.
4-Thread Serger Threading
Singer 4-thread serger threading creates a secure, professional seam ideal for garments. Begin by threading the left needle, then the upper looper, followed by the lower looper, and finally the right needle. Each thread follows a distinct path, guided by numbered indicators on the machine.
Ensure each thread is properly inserted into the tension discs, maintaining consistent pressure. Incorrect tension leads to looping or puckering. Test the stitch on scrap fabric after threading, adjusting tension as needed. This configuration provides a durable, finished edge, preventing fraying and enhancing garment longevity.
3-Thread Serger Threading
Singer’s 3-thread serger threading is a simplified method, perfect for finishing raw edges and creating narrow hems. This setup utilizes one needle and two loopers, offering a balance between speed and seam strength. Begin by threading the needle, then the upper and lower loopers, carefully following the machine’s numbered threading path.
Proper thread insertion through the tension discs is crucial for balanced stitches. Test on scrap fabric and adjust tension for optimal results. This technique is ideal for lightweight fabrics and decorative edging, providing a clean, professional finish with fewer thread adjustments.
Adjusting Serger Settings
Singer serger settings significantly impact stitch quality and fabric handling. Mastering these adjustments ensures professional results. Stitch length controls the density of stitches; shorter lengths for delicate fabrics, longer for heavier materials. Differential feed prevents puckering or stretching, adjusting how fabric is fed through the machine – higher numbers for stretchy fabrics, lower for woven ones.
Stitch width determines the seam allowance. Experiment with settings on scrap fabric before starting your project. Proper adjustment prevents skipped stitches, broken threads, and ensures a clean, even finish. Refer to your manual for specific recommendations.
Stitch Length Adjustment
Singer serger stitch length directly influences seam strength and appearance. A shorter stitch length, typically between 1.0 and 2;0 mm, is ideal for lightweight or delicate fabrics like silk or chiffon, creating a denser, more secure seam. Conversely, a longer stitch length, ranging from 3.0 to 4.0 mm, suits heavier fabrics such as denim or upholstery, preventing puckering.
Always test stitch length on scrap fabric mirroring your project material. Incorrect length can cause skipped stitches or fabric bunching. Fine-tune the dial for optimal results, ensuring a balanced and professional finish.
Differential Feed Adjustment
Singer sergers feature differential feed, crucial for preventing wavy or stretched seams, especially with knit fabrics. This adjustment controls the speed difference between the feed dogs, impacting fabric movement. A higher differential feed (over 1.0) gathers fabric, ideal for creating ruffles or decorative effects.
Conversely, a lower setting (under 1.0) reduces stretching on knits, ensuring a flat, stable seam. A standard setting of 1.0 is suitable for woven fabrics. Always test on scrap material to achieve the desired result, preventing puckering or stretching during your project.
Stitch Width Adjustment
Singer serger stitch width controls the breadth of the overlock stitch, influencing seam strength and appearance. Wider stitches create a more substantial seam, suitable for heavier fabrics or areas requiring increased durability. Narrower stitches are ideal for delicate fabrics or decorative edging, minimizing bulk.
Adjustment is typically done via a dial or lever, with markings indicating stitch width. Experimenting with different widths on scrap fabric is vital to determine the optimal setting for your material and desired aesthetic. Incorrect width can lead to skipped stitches or uneven seams.
Troubleshooting Common Serger Problems
Singer sergers, while robust, can encounter issues. Broken threads are frequent, often stemming from incorrect threading or tension imbalances. Skipped stitches suggest dull needles, improper threading, or incorrect stitch settings. Looped stitches typically indicate tension problems – either too loose or too tight on one or more threads.
Regular maintenance, like cleaning and oiling, prevents many problems. Always re-thread the machine completely when troubleshooting. Consult your Singer serger manual for specific diagrams and solutions tailored to your model. Patience and methodical checking are key to resolving issues.
Broken Threads
Broken threads on a Singer serger are a common frustration, often signaling a threading issue. Ensure each thread is correctly seated in the tension discs and guides, following your manual’s diagram precisely. Incorrect tension is a primary culprit; adjust tension settings incrementally, testing after each change. Dull or damaged needles can also cause breakage, necessitating replacement.
Low-quality thread is another potential cause – opt for threads designed for sergers. Finally, check for lint buildup within the thread path, as this can create friction and lead to breaks. Consistent maintenance prevents this.
Skipped Stitches
Skipped stitches on your Singer serger often indicate a problem with the needle or its interaction with the fabric. First, verify you’re using the correct needle type and size for the fabric weight. A bent or damaged needle must be replaced immediately. Ensure the needle is fully inserted and tightened correctly.
Incorrect threading, particularly with the loopers, can also cause skipped stitches. Re-thread the machine carefully, referencing the manual. Finally, check the presser foot pressure; insufficient pressure may not feed the fabric evenly.
Looped Stitches

Looped stitches on a Singer serger typically signal an issue with thread tension; If loops appear on the underside of the fabric, the lower looper tension is likely too loose; tighten it incrementally. Conversely, loops on the top suggest the upper looper tension needs adjustment – tighten it slightly.
Improper threading is a frequent culprit, so re-thread both loopers meticulously. Ensure the thread is properly seated in the tension discs. Also, verify the correct needle and looper timing; a misalignment can cause looping.
Serger Maintenance
Regular maintenance is crucial for optimal Singer serger performance. Lint buildup significantly impacts stitch quality, so cleaning after each use is recommended. Use a soft brush to remove debris from all areas, including the loopers and needle area.
Periodically, apply a drop of serger oil to the moving parts – loopers, needles, and any points indicated in your manual. Avoid over-oiling, as this attracts lint. Inspect the blades for sharpness; dull blades cause skipped stitches and frayed edges. Replace them as needed to maintain clean cuts;
Cleaning Your Singer Serger
Consistent cleaning prevents lint accumulation, a primary cause of serger malfunctions. Begin by disconnecting the power. Utilize a soft brush – a dedicated serger brush is ideal – to gently remove lint from around the loopers, needles, and feed dogs. Pay close attention to areas inaccessible at first glance.
A vacuum cleaner with a brush attachment can effectively remove larger lint deposits. For stubborn buildup, a cotton swab dipped in rubbing alcohol can be used cautiously. Always ensure the serger is completely dry before resuming operation. Regular cleaning extends the machine’s lifespan.

Oiling Your Singer Serger
Proper lubrication is crucial for smooth serger operation and longevity. Use only Singer-recommended serger oil; other oils can cause buildup and damage. Apply a small drop of oil to the oiling points identified in your serger’s manual – typically around the loopers, needles, and any moving parts exhibiting friction.
Avoid over-oiling, as excess oil attracts lint. After oiling, operate the serger slowly for a few minutes to distribute the oil evenly. Wipe away any excess oil with a clean cloth. Regular oiling, combined with cleaning, ensures optimal performance.
Singer Serger Models by Year
Tracing Singer serger history through production years can be complex, as records aren’t fully comprehensive. The available lists primarily focus on domestic sewing machine models, with industrial serger data being less readily accessible. Singer continually updates its offerings, introducing new features and designs annually.
Early sergers differed significantly from modern ones. Identifying a serger’s approximate age often relies on its features, build quality, and available documentation. Researching specific model numbers and comparing them to known production timelines is key to accurate dating.
Identifying Vintage Singer Serger Models
Recognizing vintage Singer sergers requires careful observation. Look for distinct features like older motor designs, specific decal patterns, and unique serial number placements. Photos of common models, often with dotted lines indicating areas to examine, are invaluable resources for identification.
Pay attention to the machine’s overall construction and materials. Earlier models frequently used heavier, more durable components. Serial numbers, when legible, can provide clues, but databases aren’t always complete. Comparing your machine to online images is crucial for accurate dating and model confirmation.
Finding Singer Serger Manuals Online
Locating Singer serger manuals online is often straightforward. Singer’s official website is a primary resource, though availability varies by model and year. Numerous third-party websites archive manuals, offering a broader selection, including those for discontinued machines.
Online forums dedicated to sewing and serging frequently host manual downloads or links. Searching by model number is essential for accurate results. Heather’s Singer Online is a valuable resource, constantly adding new models. Remember to verify the manual’s compatibility with your specific serger.
Singer Industrial Serger Machines
Singer offers a robust line of industrial serger machines designed for high-volume and demanding applications. Key models include the SINGER 20G, a direct-drive, energy-saving machine capable of straight and zigzag lockstitch sewing. The SINGER 712G E Series is another popular choice, also featuring direct-drive technology for efficiency and precision.
These machines typically require specialized knowledge for operation and maintenance. Finding specific manuals for industrial Singer sergers often necessitates searching dedicated industrial sewing machine resources and contacting Singer’s industrial sales network.
SINGER 20G Direct Drive Energy Saving Straight and Zig Zag lockstitch Industrial Sewing Machine
The SINGER 20G is a high-performance, direct-drive industrial sewing machine renowned for its energy efficiency and versatility. It excels in both straight and zigzag lockstitch applications, making it suitable for a wide range of fabrics and garment constructions.
Its direct-drive motor contributes to quieter operation and precise control. While a dedicated Singer 20G manual is crucial for optimal use, resources often focus on industrial machine maintenance and troubleshooting. Proper lubrication and needle selection are vital for consistent performance.
SINGER 712G E Series Direct Drive Industrial Sewing Machine
The SINGER 712G E Series is a robust, direct-drive industrial sewing machine designed for heavy-duty applications. This machine delivers consistent stitch quality and reliable performance, ideal for demanding production environments. Its direct-drive system ensures smooth, quiet operation and precise control over sewing speed.
Accessing a dedicated Singer 712G manual is essential for understanding its specific features and maintenance requirements. Proper needle selection, tension adjustments, and regular lubrication are key to maximizing its lifespan and efficiency. It’s a workhorse for industrial sewing needs.
Serger vs. Overlocker: What’s the Difference?
The terms “serger” and “overlocker” are often used interchangeably, causing confusion among sewing enthusiasts. Essentially, they perform the same function: finishing fabric edges to prevent fraying and creating professional-looking seams. However, regional preferences dictate the terminology.

In North America, “serger” is the common term, while “overlocker” prevails in the UK and other parts of the world. Singer machines marketed as both demonstrate this duality. Understanding this distinction is purely semantic; the machines themselves offer similar capabilities and require comparable threading techniques as detailed in your Singer serger manual.
Advanced Serging Techniques
Once comfortable with basic serging, explore techniques to elevate your projects. Singer sergers excel at creating decorative edges and specialized seams beyond simple finishing. Rolled hemming, a popular choice for lightweight fabrics, produces a delicate, narrow hem ideal for scarves and blouses.
Flatlocking, another versatile technique, creates a strong, flat seam resembling a decorative topstitch. Mastering these skills, guided by your Singer serger manual, unlocks creative possibilities. Experiment with different threads and stitch settings to achieve unique textures and professional results, expanding your sewing repertoire.
Rolled Hemming
Singer sergers simplify creating delicate rolled hems, perfect for lightweight fabrics like chiffon or silk. This technique involves carefully folding the fabric edge as it feeds through the serger, resulting in a narrow, finished edge. Adjust your Singer serger’s settings – typically using a narrow stitch width and reduced differential feed – to achieve a clean roll.
Consult your Singer serger manual for specific rolled hem foot recommendations and threading configurations. Practice on scrap fabric to perfect tension and ensure a consistent, professional finish. Rolled hems add a refined touch to garments and accessories;

Flatlocking
Singer sergers excel at flatlocking, a technique creating strong, decorative seams resembling a flat fell. This method involves serging two fabric pieces together with the wrong sides facing, then unfolding and pressing the seam flat. Adjust your Singer serger’s tension and stitch length for optimal results; a slightly looser upper looper tension often works best.
Refer to your Singer serger manual for specific flatlocking foot options and threading guides. Flatlocked seams are durable and visually appealing, ideal for activewear or garments requiring reinforced seams. Practice on scraps to master the technique.
Resources for Singer Serger Users
Singer provides extensive online support for serger owners. The official Singer website (singer.com) offers downloadable manuals, FAQs, and troubleshooting guides for various models. Numerous YouTube channels feature tutorials on threading, maintenance, and advanced techniques specific to Singer sergers.
Online sewing communities and forums, like those on Facebook and dedicated sewing websites, provide platforms for users to share tips, ask questions, and receive peer support. Heather’s Singer Online (heatherssingeronline.com) is a valuable resource for parts and assistance.
Where to Buy Singer Serger Parts
Finding replacement parts for your Singer serger is crucial for maintaining its performance. Heather’s Singer Online (heatherssingeronline.com) specializes in Singer parts, offering a wide selection and frequently adding new models. Major online retailers like Amazon and eBay also carry a variety of Singer serger components.
Local sewing machine repair shops often stock common parts and can order specific items if needed. The official Singer website may direct you to authorized dealers for parts purchases. Always verify part compatibility with your specific serger model before ordering.