
Paint Your Own Cookies: A Comprehensive Guide
Dive into the delightful world of edible art! This guide unlocks creativity with DIY cookie kits, perfect for premier parties and festive fun, supporting local bakers.
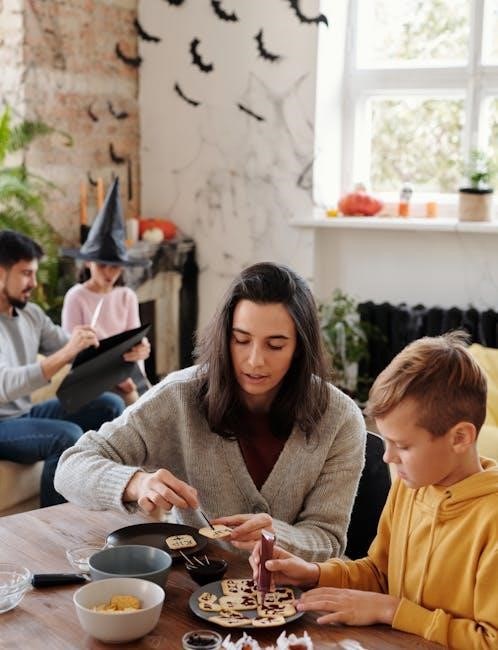
Embrace the magic of holiday baking, from Halloween to Easter, with easy-to-use kits that transform simple cookies into personalized masterpieces for all ages.
Unleash your inner artist and enjoy a sweet, festive activity, whether you’re a seasoned decorator or a beginner, creating memorable moments with every brushstroke.
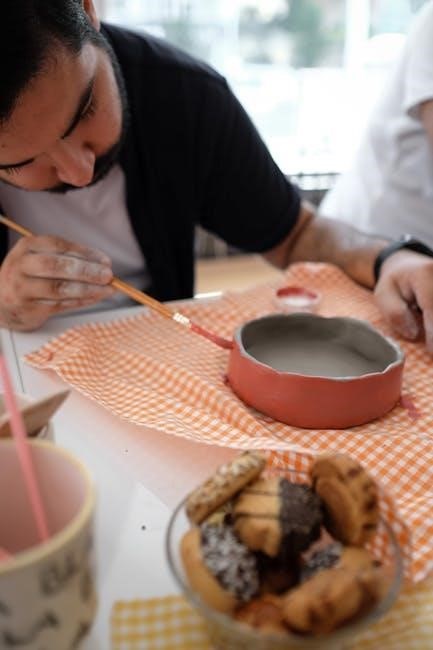
Welcome to the exciting realm of paint your own cookies! This increasingly popular trend blends the joy of baking with the artistic expression of painting, offering a unique and engaging activity for all ages. Forget complicated frosting techniques; these kits simplify cookie decorating, allowing anyone to create stunning edible art.
The core concept revolves around pre-baked cookies – often sugar cookies – paired with edible paints and fine-tipped brushes. It’s a sweet life, indeed! From themed kits inspired by movies like Hocus Pocus to seasonal designs for Halloween, Christmas, and Easter, the possibilities are endless.
DIY cookie decorating isn’t just a fun pastime; it’s a way to support local businesses like bakeries in Alpharetta and Grand Rapids, offering convenient to-go kits. Get ready to unleash your inner artist!
Why Choose Paint Your Own Cookies?
Paint your own cookies offer a delightful alternative to traditional frosting methods. They eliminate the need for precise piping skills and complex techniques, making decorating accessible to everyone, regardless of artistic ability. This simplicity is a major draw, especially for families and those new to cookie decorating.
Beyond ease of use, these kits foster creativity and personalization. Unleash your inner artist! You’re not limited by pre-made designs; you can bring your own visions to life, whether it’s a Hocus Pocus-inspired creation or an abstract masterpiece.
Furthermore, choosing these kits supports local businesses and provides a festive, engaging activity for holiday gatherings or premier watch parties. It’s a win-win! They offer a unique and memorable experience, transforming a simple treat into a cherished creation.
Benefits of DIY Cookie Kits
DIY cookie kits provide a complete, convenient solution for creative baking fun. They eliminate the hassle of sourcing individual ingredients and tools, offering everything needed for a successful decorating session in one package. This convenience is especially appealing for busy individuals and families.
These kits are incredibly versatile, catering to various themes and occasions – from spooky Halloween designs to festive holiday creations and even character-inspired cookies like those seen with the Hocus Pocus sequel.
Beyond the fun, DIY kits support local bakeries and small businesses, contributing to your community while enjoying a sweet treat. They also offer a screen-free activity, encouraging quality time and artistic expression for all ages, making staying at home a little sweeter!
Essential Supplies for Painting Cookies
Gather your tools for edible artistry! You’ll need perfectly baked cookies, vibrant edible paints, and a selection of fine-tipped brushes for detailed designs.
Cookie Base Selection
Choosing the right cookie foundation is crucial for a successful painting experience. Sugar cookies are the most popular choice due to their flat, smooth surface – an ideal canvas for your edible artwork! However, shortbread or gingerbread cookies can also work well, offering different flavors and textures.
Consider the cookie’s thickness; a slightly thicker cookie will hold the paint better without becoming soggy. Pre-baked, plain cookies are best, allowing you to focus solely on the decorating process. Many DIY kits, like those from Its a Sweet Life Bakery, provide pre-baked cookies, simplifying the process.
Ensure the cookies are completely cooled before you begin painting. A warm cookie will cause the edible paint to run and bleed, ruining your design. A firm, cool base guarantees clean lines and vibrant colors, enhancing your creative expression!
Edible Paints: Types and Brands
Edible paints come in various forms, each offering unique qualities. Gel-based food colors mixed with a bit of vodka or lemon extract are a popular choice, providing vibrant hues that dry quickly. Pre-mixed edible paint palettes are also readily available, offering convenience for beginners.
Look for paints specifically designed for cookie decorating. Avoid using regular acrylic paints, as they are not edible! Brands like AmeriColor and Wilton offer a wide range of edible colors and paint options. Consider the consistency; you want a paint that’s smooth and easy to apply.
Gel colors offer intense pigmentation, requiring only a small amount for desired shades. Remember to always check ingredient lists for allergens, especially if gifting kits to others.
Paintbrushes: Sizes and Materials
Selecting the right brushes is crucial for detailed cookie painting. A variety pack is ideal, offering different sizes for various design elements. Fine-tipped brushes (sizes 000, 00, and 0) are perfect for intricate details and outlining, while larger brushes (sizes 2-6) are better for filling in larger areas.
Look for brushes specifically labeled as food-safe or edible art brushes. These are typically made with synthetic bristles, ensuring no unwanted flavors or textures are imparted to the cookies. Natural bristles can sometimes have a slight taste.
Maintain brush quality by cleaning them immediately after use with warm water. Proper care extends their lifespan and prevents color contamination.
Step-by-Step Instructions: Painting Your Cookies
Begin with a smooth, cooled cookie base. Gently apply edible paints using appropriate brushes, layering colors for depth, and allowing ample drying time between coats.
Preparing the Cookies for Painting
Ensuring a flawless canvas is key! Begin with completely cooled cookies; warmth can cause paints to bleed and smear, ruining your intricate designs. A smooth, even surface is ideal, so inspect your cookie base for any imperfections.
Consider a crumb coat of white royal icing if your cookies aren’t perfectly smooth – this provides a pristine base for vibrant colors. Allow the icing to dry completely before painting; this prevents mixing and muddling of colors.
Lightly dust the cookie surface with cornstarch to reduce tackiness, especially if using a very fluid paint. This helps the paint glide on smoothly. Have all your supplies readily available – paints, brushes, water (for thinning), and paper towels for quick clean-up – to streamline the process and maintain focus on your artistic vision.
Applying the Edible Paint
Start with light layers! Applying thin coats of edible paint prevents bleeding and allows for better control. Build up color gradually, letting each layer dry slightly before adding another. This technique is crucial for achieving vibrant, defined designs.
Utilize varying brush sizes for different details. Fine-tipped brushes are perfect for intricate lines and small accents, while larger brushes cover broader areas efficiently. Dip your brush lightly into the paint, avoiding excess product.
Don’t be afraid to dilute your paint with a tiny bit of water if needed, for a smoother consistency. Remember to clean your brushes frequently to prevent color contamination and maintain crisp, clean lines throughout your cookie masterpiece!
Drying and Setting the Paint
Patience is key! Allow your painted cookies ample time to dry completely; This typically takes several hours, but can vary depending on the paint thickness and humidity. Resist the urge to handle them prematurely to avoid smudging your beautiful designs.
Elevated drying is best. Place the cookies on a wire rack to ensure air circulation underneath. Avoid laying them flat on a surface, as this can cause sticking or uneven drying. A cool, dry environment accelerates the setting process.
Fully set paint ensures longevity. Once dry, the edible paint will harden, creating a beautiful, lasting finish. Proper drying prevents colors from running and ensures your artistic creations remain vibrant and intact!
Creative Cookie Painting Ideas
Let your imagination soar! From spooky Halloween scenes to enchanting Hocus Pocus characters, and vibrant Easter designs, the possibilities are deliciously endless.
Explore abstract art or geometric patterns for a modern twist, transforming simple cookies into unique, personalized edible masterpieces for any occasion.
Holiday-Themed Designs (Halloween, Christmas, Easter)
Halloween offers spooky fun – paint pumpkins, ghosts, and bats onto your cookies with vibrant orange, black, and white edible paints. Christmas calls for festive cheer! Decorate with snowflakes, Santa hats, and colorful ornaments, using reds, greens, and shimmering edible glitter.
Easter brings pastel perfection. Create adorable bunny faces, decorated eggs, and blossoming flowers with soft pinks, blues, yellows, and greens. Consider using edible markers for intricate details on egg designs.
Don’t be afraid to layer colors and experiment with different brushstrokes to achieve depth and texture. These kits elevate premier watch parties and provide a festive activity for all ages, supporting local businesses while creating sweet memories!
Character-Inspired Cookies (Hocus Pocus, etc.)
Embrace the magic of your favorite characters! With the recent Hocus Pocus sequel, paint the Sanderson sisters onto cookies – Winifred, Mary, and Sarah, capturing their iconic looks with detailed faces and witchy attire. Use purples, greens, and oranges for a truly spellbinding effect.
Beyond Hocus Pocus, consider beloved characters from films and stories. Paint superheroes, princesses, or whimsical creatures. Utilize edible markers for fine lines and intricate details, bringing your chosen characters to life on a sweet canvas.
These DIY kits are perfect for premier watch parties, elevating the experience with personalized, character-themed treats. Support local bakers and unleash your creativity!
Abstract and Geometric Patterns
Unleash your inner artist with non-representational designs! Forget realistic depictions and explore the world of abstract art on your cookies. Think bold color blocking, swirling patterns, and unexpected combinations. Geometric shapes – triangles, squares, circles – offer a structured yet creative outlet.
Experiment with different painting techniques. Try splattering, stippling, or blending colors to achieve unique textures and effects. Don’t be afraid to embrace imperfections; abstract art thrives on spontaneity and individuality.
These designs are perfect for those seeking a modern and artistic approach to cookie decorating, offering a refreshing alternative to traditional themes. It’s a sweet way to express yourself!

Tips for Successful Cookie Painting
Master clean lines and prevent bleeding! Use a steady hand, allow layers to dry, and choose the right brush for detailed work – enjoy the process!
Preventing Paint Bleeding
Controlling edible paint is key to crisp designs. Begin by ensuring your cookie base has a firm, fully-set icing outline; this acts as a vital dam. Apply thin, controlled layers of paint, allowing each coat to completely dry before adding another.
Avoid over-saturating your brush – a slightly damp brush yields better results than a dripping one. If you notice paint creeping, gently use a clean, dry brush to absorb the excess before it spreads.
For intricate designs, consider using a “flooding” technique with a thicker consistency paint within the outlined areas, minimizing the chance of color migration. Patience is paramount; rushing the drying process invites bleeding!
Achieving Clean Lines and Details
Precision is paramount for detailed cookie art! Invest in a variety of fine-tipped paintbrushes – sizes 000, 00, and 0 are excellent for intricate work. Load the brush with a small amount of paint, and practice consistent pressure for uniform lines.
Steady your hand by resting your elbow on the work surface. For sharp edges, utilize the side of the brush rather than the tip. If mistakes occur, a damp (not wet!) brush can carefully correct minor imperfections.
Consider using edible markers for exceptionally fine details, like lettering or delicate patterns. Remember, layering thin coats builds depth and allows for greater control over your artistic vision.
Storing Painted Cookies
Proper storage preserves your edible masterpieces! Once the paint is completely dry and set – typically several hours, or overnight is best – store painted cookies individually. Wrapping each cookie in food-safe cellophane bags prevents sticking and maintains the design’s integrity.
Avoid stacking cookies directly on top of each other, as this can smudge the paint. Airtight containers are ideal for longer-term storage, protecting against humidity and preserving freshness.
Painted cookies are best enjoyed within a week for optimal taste and appearance. Avoid refrigeration, as condensation can affect the paint.
Where to Buy Paint Your Own Cookie Kits
Find your creative outlet! Support local bakeries like Its a Sweet Life, or explore online retailers for convenient DIY kits and customized options.
Discover festive treats from KJ Cookies for Easter, or enjoy creations from West Michigan small businesses offering sweet, artistic experiences.
Local Bakeries and Shops
Support your community and discover unique kits! Many local bakeries are now offering “Paint Your Own Cookie” kits, especially around holidays like Halloween, Christmas, and Easter. These kits provide a delightful, interactive experience, perfect for families and parties.
Kentucky and Georgia are leading the way, with bakeries like those in Jefferson town and Alpharetta’s Halcyon development creating themed kits – notably Hocus Pocus inspired designs for movie nights!
Beyond themed options, local shops often allow for customization, catering to specific events or preferences. Visiting these establishments not only secures a fun activity but also directly supports small businesses within your area, fostering a sweet connection within the community.

Online Retailers

Convenience meets creativity! Numerous online retailers now stock “Paint Your Own Cookie” kits, offering a vast selection and doorstep delivery. This is ideal for those without access to local bakeries or seeking a wider range of themes and designs.
Expect to find options for all occasions, from general holiday sets to character-inspired kits like the popular Hocus Pocus theme. Many retailers also offer DIY kit components, allowing you to assemble your own personalized experience.
Be sure to compare prices and shipping costs when shopping online. Reading customer reviews can also provide valuable insights into kit quality and paint vibrancy, ensuring a sweet and successful decorating session!
DIY Kit Options and Customization
For the ultimate personalized touch, consider assembling your own “Paint Your Own Cookie” kit! This allows complete control over cookie base selection, edible paint colors, and brush types, catering to specific preferences and dietary needs.
Source plain sugar cookies from local bakeries or bake your own. Then, purchase edible food coloring gels and vodka (for thinning) separately. This offers greater flexibility than pre-mixed paints.
Elevate the experience by including themed stencils, sprinkles, or edible glitter. Customization extends to packaging – create personalized boxes for gifting! It’s a sweet way to support local businesses and unleash your creativity.

Safety Considerations When Using Edible Paints
Always check ingredient lists for allergens and supervise children closely during painting. Store edible paints properly to maintain freshness and prevent contamination;

Ingredients and Allergens
Understanding the composition of edible paints is crucial for a safe and enjoyable experience; Most paints utilize a base of powdered sugar, corn syrup, and food coloring, but variations exist.
Carefully review ingredient lists, especially if allergies are a concern. Common allergens to watch for include nuts (often used in coloring), soy lecithin (an emulsifier), and dairy (in some paint bases).
DIY kits may contain pre-mixed paints, while others require you to add water or a liquid base. Always verify the source and quality of all components.
For individuals with severe allergies, consider making your own paints using certified allergen-free ingredients to ensure complete control over the composition.
Transparency from the baker or kit provider is key – don’t hesitate to inquire about potential allergens before purchasing or using the product.
Supervision for Children
Cookie painting is a fantastic activity for children, but adult supervision is absolutely essential. Edible paints, while non-toxic, are not intended for large-scale consumption.
Young children may be tempted to eat excessive amounts of paint, potentially leading to stomach upset or sugar rushes. Constant monitoring ensures responsible paint usage.
Assist with opening paint containers and dispensing the paint to prevent spills and ensure appropriate portion control. Guide children in applying the paint neatly.
Be mindful of small parts, such as paintbrushes, which could pose a choking hazard for very young children. Select age-appropriate brush sizes and supervise their use.
Turn cookie decorating into a learning experience, discussing colors, shapes, and creativity while ensuring a safe and enjoyable environment for everyone involved.
Proper Paint Storage
Maintaining the quality and safety of your edible paints requires careful storage. Always reseal paint containers tightly after each use to prevent drying and contamination.
Store paints in a cool, dark, and dry place, away from direct sunlight and heat sources. This helps preserve the color vibrancy and consistency of the paints.
Avoid storing paints in the refrigerator, as condensation can form and affect the paint’s texture. Room temperature is generally ideal for optimal preservation.
Check the expiration date on the paint containers and discard any expired paints. Using expired paints may result in altered color or texture.
Keep paints out of reach of children and pets, even when stored. Proper storage ensures the paints remain safe and usable for future cookie decorating adventures.