
KitchenAid Mixer Repair Manual: A Comprehensive Guide
This manual details KitchenAid mixer troubleshooting, repair, and maintenance, covering models from various years, including those with touchpad issues and refrigerator components.
Genuine parts sourcing, gearcase lubrication, motor replacement, and electrical diagnostics are all addressed, alongside preventative measures for optimal appliance longevity.
Understanding Your KitchenAid Mixer Model
KitchenAid mixers, renowned for their durability, come in a variety of models – tilt-head, bowl-lift, and professional series – each with unique characteristics. Identifying your specific model is the crucial first step in any repair process. Locate the model and serial number plate, typically found on the bottom of the mixer base or the motor housing.
These numbers are essential for sourcing the correct replacement parts and accessing model-specific repair diagrams. Older models, like those potentially facing touchpad failures after 20 years of use, may require specialized troubleshooting. Understanding the age of your mixer, as indicated by the serial number, can also help anticipate potential issues.
Different series utilize varying components; for instance, professional models often have more robust motors and gearcases. Familiarize yourself with your mixer’s features and operation before attempting any repairs, referencing the original owner’s manual if available.
Identifying Common KitchenAid Mixer Problems
Several issues commonly plague KitchenAid mixers, ranging from simple fixes to more complex repairs. A frequent complaint is the mixer failing to power on, often stemming from power supply issues or a faulty thermal fuse; Another prevalent problem involves the motor humming but the mixing attachment not rotating, indicating a gearcase malfunction or a broken drive coupling.
Bowl rotation failures can arise from drive connection problems, requiring inspection of the drive shaft and associated components. Older models are susceptible to touchpad malfunctions, where individual switches wear out over time, potentially requiring replacement – though parts availability can be a challenge.
Overheating, often linked to compressor issues in related appliances like refrigerators, can also affect mixer performance. Recognizing these common symptoms allows for targeted diagnosis and efficient repair, saving time and resources.
Safety Precautions Before Repair
Prioritizing safety is paramount when undertaking any KitchenAid mixer repair. Always disconnect the appliance from the power outlet before commencing any work to prevent electric shock. Ensure the mixer is stable and securely positioned on a flat surface. Wear appropriate safety glasses to protect your eyes from flying debris during disassembly.
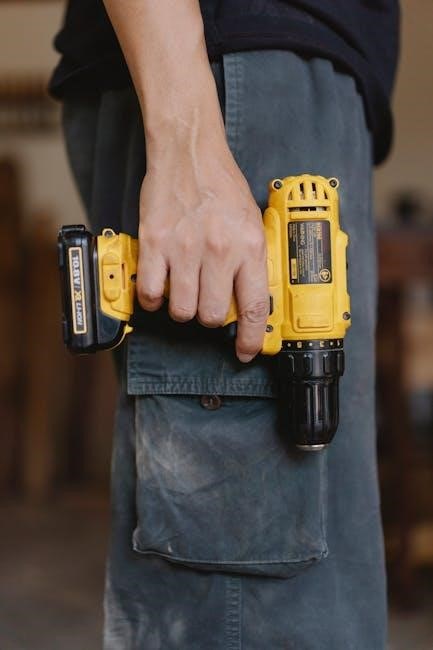
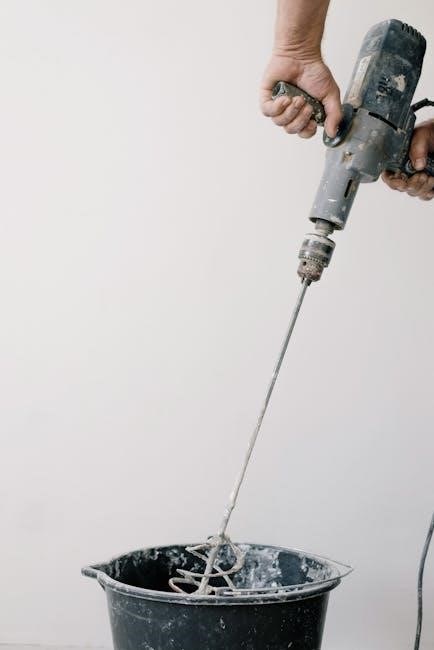
Exercise caution when handling tools, using only those designed for the task. Be mindful of sharp edges and potential pinch points within the mixer’s mechanism. If dealing with electrical components, verify they are fully discharged before touching them.
Proper ventilation is crucial, especially when working with lubricants or cleaning agents. If unsure about any repair step, consult a qualified technician. Ignoring these precautions can lead to injury or further damage to the appliance.
Diagnosing the Issue
Accurate diagnosis is key; check power supply, motor function, and drive connections. Identifying humming, lack of rotation, or electrical faults guides repair efforts.
Mixer Won’t Turn On: Power Supply Checks
Begin by verifying the power cord is securely plugged into a functioning outlet. Test the outlet with another appliance to confirm it’s delivering power. Inspect the power cord itself for any visible damage, such as cuts or fraying; a damaged cord necessitates immediate replacement.
Next, examine the mixer’s thermal fuse, a safety component designed to blow if the motor overheats. A blown fuse prevents the mixer from starting. Locate the fuse (refer to your model’s parts diagram) and test its continuity with a multimeter. If it lacks continuity, it must be replaced.
Carefully check the wiring harness for loose connections or damaged wires. Disconnect power before inspecting internal wiring. Look for any signs of corrosion or burnt wires. If issues are found, repair or replace the affected wiring. Finally, consider the speed control switch; a faulty switch can interrupt the power supply to the motor.
Motor Humming But Not Rotating: Gearcase Issues
A humming motor that isn’t rotating typically indicates a problem within the gearcase. This often stems from worn or broken gears, or insufficient lubrication. Disconnect power before accessing the gearcase. Carefully remove the gearcase cover and inspect the gears for visible damage – chipped teeth or complete breakage.
If gears appear intact, the issue may be hardened or insufficient grease. Old grease can create excessive friction, preventing the motor from turning the gears. Remove the old grease, thoroughly clean the gearcase components, and apply fresh KitchenAid gearcase lubricant.
Ensure proper gear alignment during reassembly. Incorrect alignment can bind the gears and prevent rotation. If gear damage is present, replacement is necessary. A complete gearcase repair kit is often the most cost-effective solution.
Bowl Not Rotating: Drive Connection Problems
If the mixer motor runs but the bowl isn’t rotating, the issue likely lies within the drive connection system. The most common culprit is a worn or broken drive coupling – a small plastic piece connecting the motor to the bowl-lift mechanism. Inspect the coupling for cracks or complete separation. Replacement is straightforward, requiring removal of the base plate.
Also, check the bowl-lift lever and its connection to the gearcase. Ensure the lever moves freely and engages properly. A loose or damaged lever can prevent the bowl from locking into the drive mechanism. Examine the drive shaft for any bending or damage.
Finally, verify the bowl itself is correctly seated and locked into place. A misaligned bowl won’t engage with the drive system.

Repairing Specific Components
Detailed instructions cover replacing the drive coupling, fixing speed control switches, gearcase repair with lubrication, and complete motor replacement procedures.
Replacing the Drive Coupling
The drive coupling is a frequent failure point in KitchenAid mixers, often manifesting as the bowl not rotating despite the motor running. Replacing it is a relatively straightforward repair, requiring minimal tools and technical expertise. First, disconnect the mixer from the power source – safety is paramount! Remove the bowl and tilt the mixer head back.
Locate the drive coupling beneath the head, a small rubber piece connecting the motor shaft to the bowl drive. Gently pry the old coupling off, noting its orientation. Clean the motor shaft and the bowl drive thoroughly.
Install the new drive coupling, ensuring it’s seated correctly. A small amount of food-grade grease can aid installation and prolong its life. Reassemble the mixer, test its functionality, and verify the bowl rotates smoothly. Using genuine KitchenAid replacement parts is highly recommended for optimal performance and longevity.
Fixing a Broken Speed Control Switch
A malfunctioning speed control switch can prevent the KitchenAid mixer from operating at all speeds or cause erratic speed changes. Diagnosing a faulty switch requires a multimeter to test for continuity across each speed setting. Always disconnect power before disassembly! Accessing the switch typically involves removing the mixer’s control panel, often secured with screws hidden beneath trim pieces.
Once exposed, carefully disconnect the wiring harness from the switch. Note the wiring configuration before removal for correct reassembly. Install the new speed control switch, ensuring secure connections of the wiring harness.
Reassemble the control panel, testing each speed setting to confirm proper operation. Older models may face challenges with parts availability, potentially requiring creative solutions or professional assistance.
Gearcase Repair and Lubrication
The gearcase is the heart of the KitchenAid mixer, responsible for transferring power to the bowl and attachments. A noisy or non-rotating bowl often indicates a gearcase issue. Repair typically involves disassembly, inspection for worn or broken gears, and thorough cleaning. Always disconnect power before beginning!
Proper lubrication is crucial. Use KitchenAid-approved gearcase grease – do not substitute with other types. Apply grease liberally to all gears during reassembly, ensuring complete coverage. Inspect the seals for damage and replace if necessary to prevent leaks.
If gears are damaged, replacement is required. Reassemble carefully, following the original configuration. A properly maintained gearcase ensures smooth, quiet operation for years.
Motor Replacement Procedure
Replacing the KitchenAid mixer motor is a more complex repair, requiring careful attention to electrical connections and mechanical alignment. Always disconnect power before starting! Begin by removing the base plate and disconnecting the wiring harness from the old motor. Note the wire configuration for correct reassembly.
Remove the mounting bolts securing the motor to the mixer body. Carefully lift out the old motor and install the new one, ensuring proper alignment with the gearcase. Reconnect the wiring harness, matching the wires to their original positions.
Secure the motor with the mounting bolts and reattach the base plate. Test the mixer to confirm proper operation. If issues persist, double-check all connections and ensure the motor is securely mounted.
Troubleshooting Electrical Issues
Electrical faults demand careful diagnosis, checking wiring, thermal fuses, and touchpads (older models) for continuity and damage, ensuring safe operation;
Checking the Wiring Harness
A thorough inspection of the KitchenAid mixer’s wiring harness is crucial when diagnosing electrical problems. Begin by disconnecting the mixer from the power source – safety first! Visually examine the entire harness for any signs of damage, including frayed wires, cracked insulation, or burnt connectors. Pay close attention to areas where the harness bends or rubs against the mixer’s chassis, as these are common points of wear.
Use a multimeter to test each wire for continuity. A lack of continuity indicates a break in the wire, requiring repair or replacement. Check for shorts to ground by testing between each wire and the mixer’s metal frame. Any detected shorts must be addressed immediately. Carefully inspect all connectors, ensuring they are clean, secure, and free from corrosion. Loose or corroded connectors can cause intermittent electrical issues.
Refer to the wiring diagram (often found inside the mixer or online) to accurately identify each wire’s function and expected resistance. Document any findings and replace damaged components as needed.
Replacing the Thermal Fuse
The thermal fuse is a vital safety component within the KitchenAid mixer, designed to protect the motor from overheating. If the mixer consistently fails to start, and other electrical checks pass, a blown thermal fuse is a likely culprit. Before replacement, always disconnect the mixer from the power supply. Locate the thermal fuse – typically near the motor windings – and carefully note its amperage and voltage rating.
Using appropriate tools, gently disconnect the old fuse from its wiring harness. Ensure the new fuse matches the original’s specifications exactly; using an incorrect fuse can create a fire hazard. Connect the new fuse securely, ensuring proper polarity if applicable.
After replacement, test the mixer’s operation. If the fuse blows again immediately, it indicates an underlying issue causing overheating, such as a blocked ventilation system or a faulty motor, requiring further investigation.
Diagnosing and Fixing Touchpad Problems (Older Models)
Older KitchenAid mixers utilized touchpads for speed control, which can become unreliable with age. A common issue is unresponsive or erratic button behavior. Begin by visually inspecting the touchpad for any physical damage or debris. Carefully clean the surface with a soft, dry cloth. If cleaning doesn’t resolve the issue, the touchpad itself may be failing.
Unfortunately, KitchenAid often discontinues these touchpads, making direct replacement difficult. However, skilled technicians may attempt individual switch replacement within the pad, though this is delicate work. Alternatively, consider a control board replacement if available.
Before replacing any components, verify the wiring harness connecting the touchpad to the control board is secure and undamaged. A loose connection can mimic a faulty touchpad.

Component Sourcing & Replacement Parts
Locating genuine KitchenAid parts is crucial for optimal performance and longevity; explore official retailers or authorized service centers for reliable replacements.
Consider OEM versus aftermarket options, balancing cost with quality and compatibility when repairing your KitchenAid mixer.
Finding Genuine KitchenAid Parts
Securing authentic KitchenAid replacement parts is paramount for maintaining the integrity and performance of your mixer. Several avenues exist for sourcing these components, each with its own advantages. The official KitchenAid website is an excellent starting point, offering a comprehensive catalog and direct ordering capabilities. However, prices may be higher compared to other sources.
Authorized KitchenAid service centers are another reliable option. These centers stock a wide range of genuine parts and can provide expert advice on identifying the correct component for your specific mixer model. Local appliance parts retailers, particularly those specializing in KitchenAid or Whirlpool products (as KitchenAid is a Whirlpool brand), often carry common replacement parts in stock. Online retailers dedicated to appliance parts, such as AppliancePartsPros or RepairClinic, can also be valuable resources, offering competitive pricing and extensive inventories.
When searching, always have your mixer’s model number readily available. This ensures you order the correct part, preventing compatibility issues. Be wary of significantly discounted parts from unverified sources, as these may be counterfeit or of inferior quality. Prioritizing genuine parts, even if slightly more expensive, will ultimately save you time and money by ensuring a successful and lasting repair.
Using OEM vs. Aftermarket Parts
The choice between Original Equipment Manufacturer (OEM) and aftermarket parts is a crucial one when repairing your KitchenAid mixer. OEM parts are manufactured by KitchenAid or its authorized suppliers, guaranteeing perfect fit and compatibility. They typically maintain the mixer’s original performance and uphold warranty validity, though they generally come at a higher cost.
Aftermarket parts, produced by third-party manufacturers, offer a more budget-friendly alternative. While often functionally similar to OEM parts, quality can vary significantly. Some aftermarket parts meet or exceed OEM standards, while others may be made with cheaper materials and exhibit reduced durability. Careful research and selecting reputable brands are essential when opting for aftermarket components.
Consider the criticality of the part. For essential components like the gearcase or motor, OEM is often recommended. For less critical parts, like knobs or certain switches, a high-quality aftermarket option might suffice. Always verify the return policy before purchasing aftermarket parts, ensuring you can return them if they don’t fit or function correctly.

Preventative Maintenance
Regular cleaning, lubrication of moving parts, and proper storage significantly extend your KitchenAid mixer’s lifespan, preventing costly repairs and ensuring peak performance.
Regular Cleaning and Lubrication
Maintaining a clean KitchenAid mixer is paramount for longevity and performance. After each use, wipe down the exterior with a damp cloth to remove splatters and residue.
Periodically disassemble and wash the bowl, beaters, dough hook, and wire whip with warm, soapy water. Ensure all parts are thoroughly dried before reassembly.
Crucially, the gearcase requires periodic lubrication. Every few years, or with heavy use, disassemble the gearcase and apply a food-grade grease specifically designed for KitchenAid mixers.
Avoid using abrasive cleaners or scouring pads, as these can damage the finish. Inspect the power cord regularly for any signs of wear or damage. A well-maintained mixer operates efficiently and reliably for years.
Proper Storage and Usage Tips
To maximize your KitchenAid mixer’s lifespan, store it in a clean, dry environment, away from extreme temperatures and humidity. When not in use for extended periods, cover the mixer to protect it from dust.
Avoid overloading the mixer beyond its capacity, as this can strain the motor and gearcase. Use the appropriate attachment speed for the task at hand; higher speeds aren’t always better.
Never immerse the mixer body in water; Always unplug the mixer before cleaning or performing any maintenance. Be mindful of the power cord, preventing it from being pinched or damaged.
Regularly check attachments for wear and tear, replacing them as needed. Following these simple guidelines will ensure years of reliable performance from your KitchenAid mixer.

Advanced Repair Considerations
Complex issues, like compressor failures in related appliances or ice maker malfunctions, demand specialized knowledge and tools for effective diagnosis and repair.
Compressor Issues in Refrigerators (Related Appliances)
KitchenAid refrigerators, often paired with mixers in kitchens, can experience compressor problems manifesting as insufficient cooling in both the refrigerator and freezer compartments. A hot-to-the-touch compressor, as reported in online forums concerning 12-year-old KitchenAid models (KUIC15PLTS1), is a key indicator of potential failure. Overheating suggests internal stress or electrical issues within the compressor itself.
Diagnosis requires checking the compressor’s windings for continuity using a multimeter, verifying proper voltage supply, and assessing the start relay and overload protector. Water overflowing from the reservoir can also signal compressor-related problems, as the ice-making process is directly linked to the cooling cycle. If the compressor isn’t running efficiently, ice production halts, and water can back up. Replacing a compressor is a complex task best left to qualified appliance technicians due to the handling of refrigerant and the need for specialized brazing equipment.
Always prioritize safety and adhere to EPA regulations regarding refrigerant handling.
Ice Maker Troubleshooting (Related Appliances)
KitchenAid refrigerators, frequently found alongside mixers, often present ice maker issues. Common problems include a failure to produce ice, even when the water supply is connected, or water overflowing from the ice maker reservoir. A compressor running hot (as seen in the KUIC15PLTS1 model) can directly impact ice production, as the cooling cycle is essential. Troubleshooting begins with verifying the water inlet valve is functioning correctly, ensuring water reaches the ice maker.
Check the ice maker’s fill cycle and ejector mechanism for obstructions. Frozen water lines are another frequent cause, requiring defrosting. Online reports highlight potential issues with the ice maker’s control module, which may need replacement. Always disconnect power before inspecting or repairing the ice maker. If the unit continues to overflow, inspect the drain line for blockages. Professional assistance is recommended for complex repairs involving refrigerant or electrical components.