Manual Car Seat Won’t Move: A Comprehensive Troubleshooting Guide
Experiencing a stuck manual car seat? This guide details common causes – from simple obstructions like dropped candy to more complex mechanical failures within the rails and levers.
Understanding the Problem

A manual car seat’s inability to slide forward or backward is a frustrating issue‚ often stemming from a disruption in its mechanical operation. This isn’t typically a car-wide malfunction‚ but rather a localized problem within the seat’s adjustment system. Common scenarios involve a jammed lever‚ a disengaged rail‚ or a foreign object obstructing the movement. Identifying whether one or both rails feel affected is crucial for diagnosis‚ as noted in forum discussions.
Common Causes of Seat Immovability
Several factors can lock a manual seat in place. A frequently reported issue is a foreign object – particularly dropped candy – wedging into the release lever mechanism‚ preventing proper operation. Mechanical problems within the seat rails themselves‚ like disengagement or corrosion‚ are also common culprits. Stuck or corroded mounting bolts can contribute‚ hindering any adjustment attempts. It’s rarely a broader vehicle issue‚ pointing towards a localized seat problem.
Foreign Object Interference

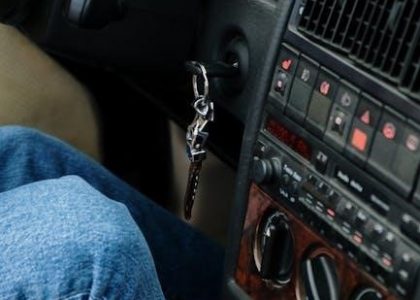
A surprisingly common cause is obstruction by dropped items. Users have successfully resolved stuck seats by discovering and removing hard candies or other debris lodged near the seat’s adjustment lever. This interference jams the mechanism‚ preventing the seat from sliding forward or backward. A thorough visual inspection around the seat base is crucial to identify and eliminate such simple‚ yet effective‚ blocking objects before pursuing more complex repairs.
Candy or Debris Blocking the Mechanism
Specifically‚ hard candies are frequently reported culprits. They can wedge themselves into the lever action‚ completely immobilizing the seat’s sliding function. One user’s experience confirms a piece of candy was the sole reason for their seat’s immobility – a simple fix! Regularly inspect the area beneath and around the seat for any fallen objects‚ as even small debris can create significant blockage and prevent smooth adjustment.

Mechanical Issues with the Seat Rails
A common issue involves the inner seat rail‚ closest to the shifter‚ disengaging while the outer rail remains functional. This creates a binding sensation. Bent or corroded seat rails also hinder movement‚ requiring inspection for damage. Addressing these mechanical faults often necessitates removing the seat for detailed examination and potential component replacement to restore proper sliding action.
Disengaged or Damaged Inner Rail
The inner rail‚ positioned near the shifter‚ frequently becomes the point of failure. Users report feeling this rail disengage‚ preventing smooth sliding. Damage‚ whether from corrosion or physical bending‚ can obstruct its proper function. Careful inspection is crucial to determine if the rail is simply disconnected or requires repair or complete replacement to regain seat movement.
Bent or Corroded Seat Rails
Seat rails are susceptible to bending and corrosion‚ especially with age and exposure to moisture. This distortion hinders smooth movement along the tracks. Corrosion builds up‚ creating friction and resistance. A visual check for any visible bends or rust is essential. Severely damaged rails often necessitate replacement to restore the seat’s full range of motion and ensure safety.
Seat Adjustment Mechanism Components
Manual seat adjustment relies on a system of levers and cables. The release lever‚ when activated‚ disengages the locking mechanisms‚ allowing the seat to slide. Cables transmit this force. Pawls within the locking mechanisms secure the seat in desired positions. Damage or disconnection within this system—a frayed cable or broken pawl—will prevent movement‚ requiring inspection and potential repair or replacement of affected parts.
The Release Lever and Cable System
The release lever initiates seat movement by pulling a cable. This cable‚ connected to the seat’s locking pawls‚ disengages them. If the lever feels loose or the cable is frayed‚ the mechanism won’t function correctly. Inspect the cable’s path for kinks or breaks. A disconnected or damaged cable prevents the lever from properly releasing the seat‚ causing it to remain stuck in place.
Locking Mechanisms and Pawls
Seat rails utilize locking mechanisms and pawls to secure positions; These pawls engage with notches in the rails‚ preventing unwanted movement. If debris obstructs these pawls‚ or they become corroded‚ the seat can become locked. A malfunctioning pawl system prevents the release lever and cable from disengaging the seat‚ resulting in immobility. Thorough cleaning and lubrication are often key to restoring function.
Initial Inspection Steps

Begin with a careful visual examination. Check the seat rails for any obvious obstructions or damage. Look closely around the seat base for dropped items – a common culprit is hard candy jamming the lever action. Attempt gentle movements to feel for resistance points. Verify the release lever operates freely; a stuck lever indicates a cable or mechanism issue needing further investigation before disassembly.
Visual Examination of the Seat Rails
Thoroughly inspect the seat rails for bends‚ corrosion‚ or debris. Pay close attention to the inner rail‚ as it’s prone to disengagement. Look for any visible damage that might impede smooth sliding. Shine a flashlight to illuminate hard-to-see areas beneath the seat. Confirm both rails appear symmetrical and undamaged‚ indicating potential mechanical failure requiring deeper assessment.
Checking for Obstructions Around the Seat Base
Carefully examine the area surrounding the seat base for any foreign objects. A common culprit is dropped candy or debris jamming the lever action. Feel around the seat tracks and underneath for anything obstructing movement. Use a flashlight for better visibility. Remember a previous fix involved removing a piece of hard candy! Ensure nothing is lodged within the mechanism itself.

Tools You’ll Need
To tackle a stuck manual seat‚ gather essential tools. You’ll require penetrating oil‚ like PB Blaster‚ to loosen corroded parts. A screwdriver and socket set are crucial for bolt removal. A Dremel or file may be needed to create flats on stubborn‚ rounded-off bolts for vice grip access. Safety glasses are also recommended during this process.
Penetrating Oil (PB Blaster)
PB Blaster is your first line of defense against stuck bolts. Its specialized formula creeps into tight spaces‚ dissolving rust and corrosion. Apply liberally to seat mounting bolts and rails‚ allowing several hours – or even overnight – for full penetration. Reapplication may be necessary for severely corroded fasteners‚ maximizing its effectiveness before attempting removal.
Screwdrivers and Socket Set
A comprehensive set of screwdrivers and sockets is crucial for disassembly. You’ll need various sizes to tackle seat mounting bolts and potentially‚ screws securing the adjustment mechanism. Ensure sockets fit snugly to prevent rounding bolt heads. Having both Phillips and flathead screwdrivers is essential‚ preparing you for diverse fastener types encountered during inspection and repair.

Dremel or File (for stubborn screws)
Severely corroded or stripped screws pose a significant challenge. A Dremel with a cutting wheel‚ or a metal file‚ can create flats on the screw heads‚ allowing vice grips to gain purchase. This is a last resort‚ requiring careful application to avoid damaging surrounding components. Prioritize penetrating oil beforehand‚ letting it soak for hours to aid removal.
Removing the Seat for Detailed Inspection
Complete seat removal facilitates thorough examination. Locate and carefully remove the mounting bolts securing the seat to the vehicle floor – visibility can be limited. Disconnect any electrical connectors present‚ typically for airbags or seat sensors‚ before lifting the seat out. Document connector locations for easier reinstallation‚ and remember safety first!
Locating and Removing Seat Mounting Bolts
Seat mounting bolts are usually found on the floor‚ often hidden by plastic covers. You might need a socket set or screwdriver to access them. If bolts are seized‚ apply penetrating oil (like PB Blaster) and allow ample soaking time – hours are best. Consider using a dremel to create flats for vice grips if necessary.
Disconnecting Electrical Connectors (if applicable)
If your seat has power features (like heated seats or airbags)‚ carefully disconnect the electrical connectors before fully removing the seat. These are typically located underneath the seat. Remember to document connector positions – a photo is helpful! Always disconnect the negative battery terminal first for safety‚ especially with lead-acid batteries.
Inspecting the Seat Rails and Mechanism
Once the seat is removed‚ thoroughly inspect the rails for bends‚ corrosion‚ or damage. Check the inner rail‚ often the culprit when a seat feels disengaged. Examine the locking mechanisms and pawls for smooth operation. Lubricate all moving parts generously with penetrating oil‚ working it into the rails and release levers to loosen any stuck components.
Identifying Bent or Damaged Components
Carefully scrutinize the seat rails for any visible bends or signs of corrosion‚ particularly on the inner rail closest to the shifter. Look for damaged locking mechanisms or pawls that may prevent smooth sliding. Inspect the release lever and cable for breaks or disconnections. Any deformation hinders movement‚ necessitating repair or replacement.
Lubricating the Rails and Locking Mechanisms
Apply penetrating oil (like PB Blaster) liberally to the seat rails‚ ensuring it reaches all sliding surfaces and locking pawls. Allow ample soak time – several hours is ideal – before attempting movement. Work the release lever repeatedly while applying the lubricant. This helps dissolve corrosion and restores smoother operation‚ potentially resolving the immobility issue.
Addressing Stuck or Corroded Bolts
Stuck seat mounting bolts are common challenges. Begin with penetrating oil‚ allowing it to soak for hours. If bolts are rounded‚ carefully use a Dremel or file to create flats for vice grips‚ providing a secure grip. Apply gentle heat (with caution!) to aid loosening. Avoid excessive force‚ which can strip the bolt heads further‚ complicating removal.

Using Penetrating Oil and Heat
Penetrating oil‚ like PB Blaster‚ is your first line of defense. Apply liberally to corroded bolts and allow ample soaking time – several hours is ideal. Gentle heat‚ applied cautiously with a heat gun‚ can expand the metal and aid penetration. Never use open flame! Combine both methods for optimal results‚ but prioritize safety and avoid damaging surrounding components.
Creating Flats for Vice Grips
If bolts are rounded‚ a Dremel or file can create flat surfaces for a secure vice grip hold. Carefully grind opposing sides of the bolt head‚ establishing a firm grip point. This allows for increased torque when attempting removal. Exercise caution to avoid damaging the seat frame or surrounding areas during this process; precision is key.

Repairing or Replacing Damaged Components
Significant damage may necessitate component replacement. Sourcing replacement seat rails can be challenging‚ potentially requiring junkyard searches or specialized auto parts suppliers. A faulty release lever or cable demands direct replacement; attempting repairs is often impractical. Prioritize genuine parts or high-quality aftermarket alternatives to ensure proper functionality and long-term durability for your seat adjustment system.
Sourcing Replacement Seat Rails
Finding replacement seat rails can prove difficult. New rails are often unavailable‚ making junkyards a primary source. Ensure compatibility with your vehicle’s year‚ make‚ and model. Thoroughly inspect salvaged rails for bends‚ corrosion‚ or damage before purchasing. Online auto parts retailers may offer aftermarket options‚ but verify quality and return policies before committing to a purchase.
Replacing the Release Lever or Cable
If the release lever or its cable is damaged‚ replacement is necessary. Disconnect the cable from both the lever and the seat mechanism. Carefully route the new cable‚ ensuring it doesn’t bind or snag during seat adjustment. Securely attach the cable at both ends‚ verifying smooth lever operation. A jammed lever‚ as seen with candy obstructions‚ indicates potential cable or lever failure.
Reinstallation of the Seat
Carefully position the repaired seat back into the vehicle. Reconnect any electrical connectors‚ ensuring they click securely into place. Align the seat mounting holes with the floorboard and hand-tighten the bolts initially. Once aligned‚ fully tighten the bolts to the manufacturer’s specified torque. Double-check all connections before testing the seat’s movement‚ prioritizing safety.
Connecting Electrical Connectors
If your seat has electrical connections (for features like seat heaters or airbags)‚ carefully reconnect them now. Ensure each connector clicks firmly into its socket – a loose connection can cause malfunctions. Inspect the wiring for any damage during removal and repair. Prioritize safety; disconnect the battery before working with electrical components.
Securing the Seat Mounting Bolts
Reinstall the seat mounting bolts‚ tightening them to the manufacturer’s specified torque. Use a torque wrench to avoid over-tightening‚ which could damage the bolts or seat frame. Ensure all bolts are securely fastened – a loose seat is a safety hazard. Double-check each bolt before fully trusting the installation.
Testing the Seat Movement
After reinstallation‚ thoroughly test the seat’s movement. Gently attempt to slide the seat forward and backward‚ verifying smooth operation without binding or resistance. Listen for any unusual noises indicating potential issues. Confirm the locking mechanism engages securely in each position‚ ensuring passenger safety during travel and preventing unwanted movement.
Ensuring Smooth Forward and Backward Motion
Confirming smooth operation is crucial. Repeatedly slide the seat along its full range of motion‚ feeling for any hitches or resistance. If movement remains stiff‚ re-inspect the rails for residual corrosion or debris. Apply additional lubricant as needed‚ and verify the release lever functions correctly‚ allowing effortless adjustments for optimal driving comfort.
Preventative Maintenance
Regular care prevents future issues. Periodically lubricate the seat rails with a silicone-based spray to maintain smooth gliding. Keep the area around the seat base clear of debris – especially small objects like candy – that could jam the mechanism. Consistent cleaning and lubrication will significantly extend the life and functionality of your manual seat.
Regular Lubrication of Seat Rails
Consistent lubrication is key to smooth operation. Apply a silicone-based lubricant to the seat rails every six months‚ or more frequently if you notice stiffness. This reduces friction and prevents corrosion‚ ensuring effortless forward and backward movement. Avoid oil-based lubricants‚ as they can attract dust and grime‚ ultimately worsening the problem over time.
Keeping the Area Around the Seat Clean
A clean environment prevents obstructions. Regularly vacuum under and around the seat to remove debris like dropped food‚ coins‚ or small objects that could jam the adjustment mechanism. This simple preventative measure addresses the common issue of foreign object interference‚ as highlighted by successful fixes involving dislodged candy.
Safety Precautions
Prioritize safety during repairs! When working near the battery‚ remember lead-acid batteries release explosive gases; disconnect the negative terminal first and avoid sparks. Use tools correctly‚ and if dealing with corroded bolts‚ employ penetrating oil cautiously. Always consult your car seat manual for specific instructions and heed warnings about electrical components.
Working Around the Battery (Lead-Acid Battery Safety)
Exercise extreme caution near the lead-acid battery. These batteries generate highly explosive gases during operation. Before commencing any work‚ carefully read the battery’s manual and follow all instructions precisely. Disconnect the negative terminal first to minimize sparking risks. Ensure adequate ventilation and avoid open flames or smoking nearby.
Proper Tool Usage
Employ tools safely and correctly throughout this process. When dealing with stubborn bolts‚ a dremel or file can create flats for vice grips‚ enhancing grip. Always wear safety glasses. Penetrating oil‚ like PB Blaster‚ requires time to soak; patience is key. Avoid excessive force‚ which can damage components. Select the correct socket or screwdriver size to prevent stripping.