Sewing Machine User Manual: A Comprehensive Guide
This comprehensive guide assists users with their sewing machines, covering everything from basic operation to advanced techniques,
and troubleshooting, ensuring a seamless sewing experience.
Welcome! This manual serves as your guide to unlocking the full potential of your new sewing machine. Whether you’re a beginner or an experienced seamster, understanding its features is key. Explore popular content – music, gaming, fashion – while learning to master stitches.
This resource details operation, maintenance, and troubleshooting, drawing from resources like YouTube Music and official blogs. We’ll navigate threading, bobbin winding, and stitch selection, ensuring you confidently create beautiful projects. Discover a world of creativity with your machine!
Safety Precautions
Prioritize safety! Always disconnect the power supply before threading, changing the needle, or performing maintenance. Keep fingers away from the needle while operating. Never force the fabric; let the machine do the work.
Be mindful of electrical components and avoid using the machine with a damaged cord. Supervise children closely when near the sewing machine. Refer to online tutorials for safe operation and explore resources like YouTube for visual guidance. Regular maintenance prevents malfunctions and ensures safe use.
Machine Components Overview
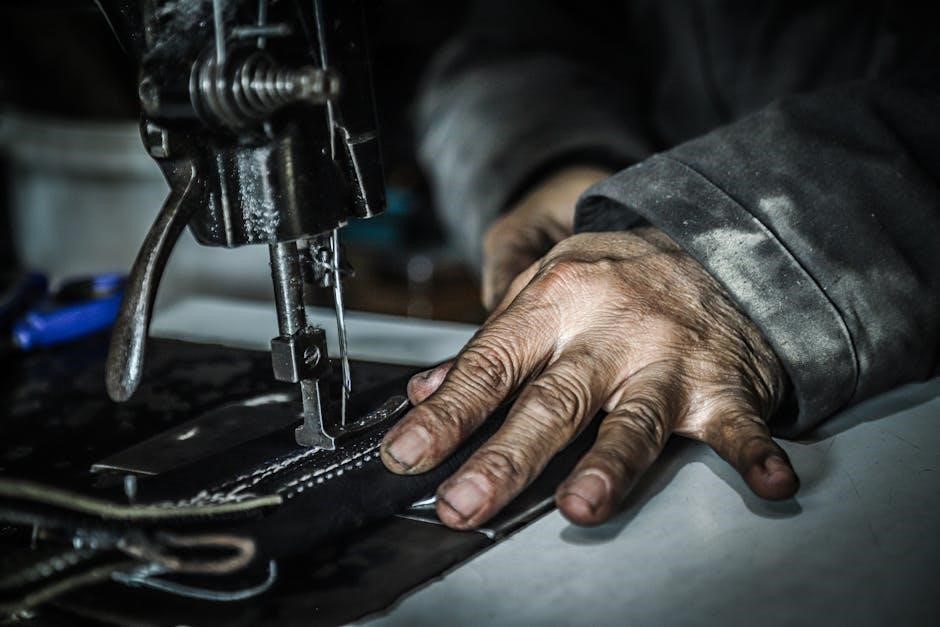
Familiarize yourself with key parts! Your sewing machine consists of a power switch, handwheel, needle clamp, presser foot, feed dogs, bobbin winder, and tension dials. Understanding these components is crucial for operation.
Explore online resources and user manuals for detailed diagrams. The bobbin winder prepares the lower thread, while the needle and presser foot work in tandem to create stitches. Proper component knowledge ensures efficient and accurate sewing, as detailed in available guides.
Identifying Key Parts
Locate essential elements! The needle pierces fabric, the presser foot holds it steady, and feed dogs advance material. The bobbin provides lower thread, while the tension discs control thread flow.
The handwheel allows manual control, and the stitch length dial adjusts stitch size. Refer to your manual for specific part locations. Recognizing these components is fundamental for successful sewing and maintenance, as highlighted in online tutorials.
Understanding the Bobbin Winder
Proper bobbin winding is crucial! Begin by placing the thread spool on the spool pin and guiding the thread through the tension disc. Engage the bobbin winder mechanism, ensuring the bobbin is correctly positioned.
Apply gentle pressure to the thread end, then start the machine at a slow speed. Allow it to wind evenly until full, then disengage. Consistent winding prevents issues during sewing, as detailed in user manuals and online resources.
Needle and Presser Foot Basics
Selecting the right needle and presser foot is key! Needles come in various sizes and types for different fabrics – universal, ballpoint, or denim. The presser foot holds the fabric in place; standard feet are for general sewing.
Specialty feet, like zipper or buttonhole feet, enhance precision. Refer to your machine’s manual for compatibility. Correct installation ensures smooth fabric feeding and prevents skipped stitches, vital for quality results.
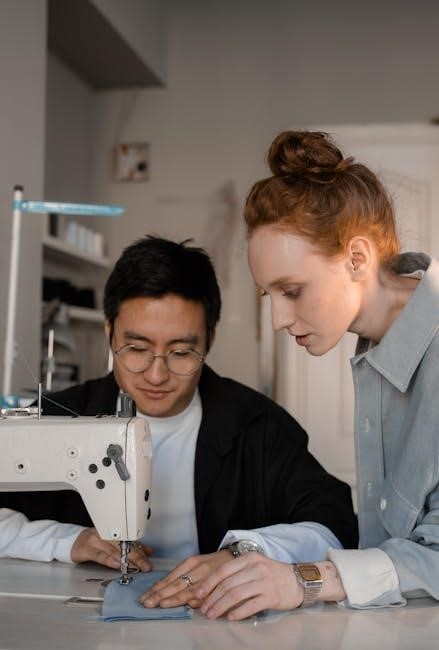
Setting Up Your Sewing Machine
Proper setup is crucial for successful sewing! Begin by connecting the power cord and placing the machine on a stable surface. Next, thread the upper thread following the machine’s diagram – a clear path is essential.
Wind the bobbin evenly and insert it correctly into the bobbin case. Finally, attach the appropriate presser foot for your project. Double-check all connections before starting to sew!
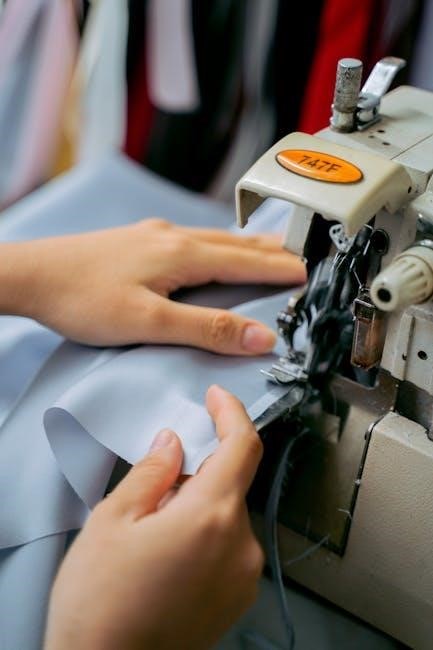
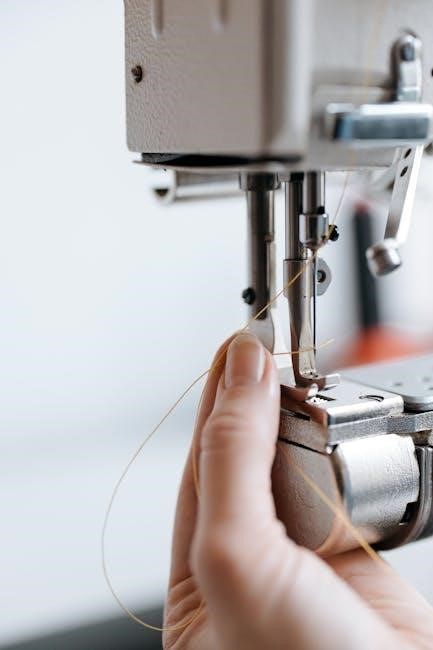
Threading the Machine
Accurate threading is fundamental to smooth operation. Consult your machine’s manual for the specific threading path, as it varies by model. Generally, thread passes through several guides, the tension discs, and finally the needle.
Ensure the presser foot is raised during threading to release tension. A properly threaded machine prevents skipped stitches and ensures consistent stitch quality. Always re-thread if experiencing issues!
Winding and Inserting the Bobbin
Proper bobbin winding is crucial for balanced stitches. Begin by placing the thread spool on the spool pin and guiding the thread through the bobbin winding tension disc. Wind the bobbin evenly, stopping when full.
Next, carefully insert the bobbin into the bobbin case, ensuring it rotates freely and the thread feeds correctly. Incorrect bobbin insertion leads to tension problems and uneven stitches.
Attaching the Presser Foot
Selecting the correct presser foot is vital for various sewing tasks. Gently lift the presser foot lever to release the existing foot. Align the new foot with the shank and push it down firmly until it clicks into place.
Ensure a secure attachment; a loose foot causes inconsistent fabric feeding. Different feet exist for zippers, buttonholes, and decorative stitching, enhancing sewing precision.
Basic Sewing Techniques
Mastering fundamental techniques unlocks your sewing potential. Begin with straight stitching, guiding the fabric smoothly under the presser foot while maintaining a consistent speed. Next, practice zigzag stitching for finishing raw edges and creating decorative elements.
Backstitching secures seams by reversing the stitching at the beginning and end, preventing unraveling. These core skills form the foundation for all sewing projects, ensuring durability and a professional finish.
Straight Stitching
The cornerstone of sewing, straight stitching creates a neat, consistent line ideal for seams and topstitching. Ensure your fabric is aligned with the guide markings on the needle plate. Gently guide the fabric, avoiding pulling or pushing, and maintain a steady, moderate speed.
Consistent pressure on the foot pedal is key. Practice on scrap fabric to achieve even stitches before tackling your project. A straight stitch is fundamental for garment construction and quilting.
Zigzag Stitching
Zigzag stitches offer versatility, preventing fabric fraying and allowing for stretchable seams. Adjust stitch width for varying effects – narrower for delicate fabrics, wider for stronger seams. This stitch is excellent for finishing raw edges, creating decorative elements, and sewing knit fabrics.
Experiment with different widths and lengths on scrap material. Zigzag stitching provides a durable and flexible seam, crucial for garments needing give.
Backstitching
Backstitching secures seams by reinforcing the beginning and end of a stitch line. After sewing, reverse the machine for a few stitches at both ends. This prevents unraveling and ensures a durable finish, especially important for projects experiencing stress.
Consistent backstitching creates a professional-looking result. Practice on scrap fabric to master the technique and achieve a secure, long-lasting seam.
Stitch Selection and Adjustment
Your sewing machine offers a variety of stitches beyond the basic straight and zigzag. Understanding these options unlocks creative potential. Adjusting stitch length and width impacts fabric appearance and seam strength.
Shorter stitch lengths are ideal for delicate fabrics, while longer lengths suit heavier materials. Experiment with settings to achieve desired results. Specialty stitches, like buttonholes and overlock, require specific feet and adjustments.
Understanding Stitch Length
Stitch length, measured in millimeters, determines the distance between each stitch. A shorter stitch length (e.g., 2.0mm) creates a denser, stronger seam, perfect for delicate fabrics or areas needing reinforcement. Conversely, a longer stitch length (e.g., 4.0mm)
is suitable for heavier fabrics or basting. Always test stitch length on a scrap piece of fabric before starting your project to ensure optimal results and prevent puckering or breakage.
Adjusting Stitch Width
Stitch width controls the breadth of zigzag or decorative stitches, measured in millimeters. A narrower width creates a tighter zigzag, ideal for finishing raw edges or stretch fabrics. Increasing the width expands the zigzag, useful for decorative applications or securing elastic.
Experiment with different widths on scrap fabric to achieve desired effects. Incorrect width can cause fabric puckering or thread issues, so testing is crucial.
Specialty Stitches (e.g., Buttonhole, Overlock)
Many machines offer specialized stitches beyond basic options. Buttonhole stitches automatically create neat buttonholes, simplifying garment construction. Overlock stitches, resembling professional serging, finish raw edges to prevent fraying and add a polished look.
Consult your machine’s manual for specific instructions on utilizing these features. Proper setup and thread selection are vital for optimal results with specialty stitches.
Troubleshooting Common Issues
Encountering problems is normal; this section addresses frequent issues. Thread breakage often stems from incorrect threading, improper tension, or a dull needle. Skipped stitches can indicate a bent needle, incorrect needle size for the fabric, or timing issues.
Needle breakage frequently results from forcing fabric or using the wrong needle type. Refer to your manual for detailed solutions and preventative measures.
Thread Breakage Problems
Frequent thread breaks usually signal a threading issue – ensure the thread path is correct and free of obstructions. Incorrect tension, particularly upper tension too tight, is a common culprit. A dull or damaged needle can also cause breaks, as can using the wrong thread type for your fabric.
Always re-thread the machine and check the needle before continuing.
Skipped Stitches Solutions
Skipped stitches often indicate a problem with the needle – it might be bent, dull, or the wrong type/size for the fabric. Ensure the needle is correctly inserted and fully seated. Incorrect threading, especially in the needle eye, can also cause this issue.
Check bobbin winding and insertion, as inconsistent tension there contributes to skipped stitches.
Needle Breakage Prevention
Preventing needle breakage starts with using the correct needle type and size for your fabric weight; heavier fabrics require stronger needles. Avoid forcing the fabric through the machine – let the feed dogs do the work. Ensure the needle plate isn’t damaged, and the needle is properly inserted.
Regularly check for bent or dull needles, replacing them promptly; Incorrect threading or tension can also strain the needle, leading to breakage.
Maintaining Your Sewing Machine
Regular maintenance is crucial for a long-lasting sewing machine. Cleaning removes lint and debris that can cause jams and malfunctions. Oiling ensures smooth operation of moving parts, reducing friction and wear. A consistent maintenance schedule – including belt checks – prevents major issues.
Always unplug the machine before cleaning or oiling. Refer to your machine’s manual for specific lubrication points and recommended oil types.
Cleaning and Oiling
Regular cleaning prevents lint and dust buildup, ensuring smooth operation. Use a brush to remove debris from the bobbin area and feed dogs. Oiling reduces friction in moving parts – apply a few drops to designated points, as indicated in your manual.
Always unplug the machine before cleaning or oiling! Avoid over-oiling, which can attract more dust. Use sewing machine oil, not household lubricants.
Belt Replacement
A broken or worn belt prevents the machine from functioning. Replacement involves removing the access panel, carefully detaching the old belt, and installing the new one, ensuring proper alignment around the motor pulley and handwheel.
Consult your machine’s diagram for specific belt routing. Tension is crucial – the belt shouldn’t be too loose or too tight. If unsure, seek professional assistance to avoid damage.
Regular Maintenance Schedule
Consistent maintenance extends your machine’s life. Daily, brush away lint after each use. Monthly, oil all lubrication points as indicated in the manual, and inspect the belt for wear.
Every six months, perform a thorough cleaning, including the bobbin area and feed dogs. Annually, consider a professional servicing to ensure optimal performance and address any hidden issues.
Advanced Sewing Techniques
Elevate your skills with specialized techniques! Fabric selection is crucial; understand weaves and weights for optimal results. Explore different presser feet – quilting, zipper, and gathering feet unlock new possibilities.
Master pattern placement to conserve fabric and achieve desired aesthetics. Precise cutting ensures accurate seams. Experiment with decorative stitches and learn advanced appliqué methods for truly unique creations.
Fabric Selection Guide
Choosing the right fabric is paramount for successful sewing. Woven fabrics, like cotton and linen, offer stability, ideal for beginners. Knit fabrics, such as jersey, stretch and drape beautifully, requiring careful handling.
Consider fabric weight – lightweight for blouses, heavier for coats. Understand fiber content; polyester is durable, silk luxurious. Always pre-wash fabrics to prevent shrinkage and color bleeding before starting your project!
Using Different Presser Feet
Presser feet dramatically expand your sewing machine’s capabilities. The standard foot suits everyday sewing, while a zigzag foot excels with decorative stitches. A buttonhole foot automates buttonhole creation, ensuring consistent results.
Explore a walking foot for even fabric feeding, crucial for quilting or slippery materials. Blind hem feet create invisible hems, and zipper feet simplify zipper insertion. Experiment to unlock your machine’s full potential!
Pattern Placement and Cutting
Accurate pattern placement is vital for garment construction. Lay patterns on fabric, following the grainline—typically parallel to the selvage edge. Pin securely, ensuring minimal shifting during cutting. Use sharp fabric scissors or a rotary cutter for clean edges.
Consider nap direction for fabrics like velvet. Cut notches outwards, not inwards, to avoid weakening seams. Transfer pattern markings carefully; these guide sewing and assembly. Precise cutting yields professional results!
Understanding Tension Settings
Proper tension balances the upper and lower threads, creating strong, even stitches. Incorrect tension leads to looping or puckering. The upper tension dial controls the thread from the spool; higher numbers tighten it. Lower tension loosens it.
Test on scrap fabric, adjusting until stitches lie flat. Uneven tension often indicates a need to re-thread or clean the machine. Mastering tension ensures durable and aesthetically pleasing seams.
Balancing Upper and Lower Thread Tension
Achieving balance between upper and lower thread tension is crucial for quality stitches. If the bobbin thread pulls to the top, loosen the upper tension or tighten the bobbin tension. Conversely, if the needle thread loops underneath, tighten the upper tension or loosen the bobbin tension.
Consistent testing on scrap fabric is key. Small adjustments are best; observe stitch formation closely to find the optimal balance for your fabric and thread combination.
Troubleshooting Tension Issues
Tension problems often manifest as looping, puckering, or thread breakage. First, re-thread both the upper thread and bobbin, ensuring proper path and seating. Check the bobbin case for lint or debris, as this impacts tension;
Incorrect tension can also stem from using mismatched thread weights or fabric types. Experiment with slight adjustments to both upper and lower tension dials, testing on scrap fabric after each change.
Sewing Machine Accessories
Enhance your sewing capabilities with a range of optional accessories! Specialty presser feet, like a walking foot, are invaluable for quilting and handling multiple fabric layers. Buttonhole and overlock feet simplify these tasks.
Consider additional attachments for specific projects – seam guides, edge stitchers, and even embroidery hoops expand creative possibilities. Explore resources to discover accessories tailored to your sewing needs and machine model.
Optional Feet and Attachments
Expand your machine’s versatility with optional presser feet! A zipper foot simplifies installing zippers, while a blind hem foot creates professional-looking hems. Decorative feet add unique stitch patterns. Attachments like seam rippers and fabric guides improve precision.
Explore specialized options for quilting, embroidery, or garment construction. Refer to your machine’s manual for compatible accessories and proper installation techniques, unlocking new creative potential.
Using a Walking Foot
A walking foot is ideal for quilting and sewing multiple layers of fabric, preventing shifting and puckering. Unlike a standard presser foot, it moves the fabric from both the top and bottom, ensuring even feeding.
Attach the walking foot following your machine’s instructions. Reduce presser foot pressure if needed. It’s particularly useful for slippery or bulky materials like velvet, leather, or batting, delivering consistently beautiful results.
Quilting Accessories
Enhance your quilting experience with specialized accessories! These include a walking foot for even fabric layers, a quarter-inch foot for precise seams, and a free-motion quilting foot for creative designs.
Consider a seam guide for accurate stitching and a quilting ruler for marking precise lines. These tools, combined with quality thread and batting, will elevate your quilting projects, ensuring professional-looking results and lasting beauty.
Resources and Further Learning
Expand your sewing knowledge through online tutorials and videos on platforms like YouTube, offering demonstrations of techniques and troubleshooting tips. Explore sewing machine repair services for professional assistance with maintenance and complex issues.
Numerous books and websites provide in-depth guides, pattern resources, and community forums for sharing ideas and seeking advice. Utilize these resources to continuously improve your skills and unlock your creative potential in the world of sewing!
Online Tutorials and Videos
Numerous platforms, like YouTube, offer a wealth of free sewing tutorials and videos. These resources demonstrate everything from basic threading to advanced techniques, catering to all skill levels. Discover channels dedicated to specific machine models or sewing styles.
Visual learners will benefit from step-by-step demonstrations, while troubleshooting videos can quickly resolve common issues. Explore playlists curated for beginners or those seeking inspiration for new projects, enhancing your sewing journey.
Sewing Machine Repair Services
When encountering complex issues beyond self-troubleshooting, professional repair services are invaluable. Local sewing machine shops often provide repair, maintenance, and cleaning services, ensuring optimal machine performance.
Consider authorized dealers for your machine’s brand, as they possess specialized knowledge and access to genuine parts. Online searches can identify reputable repair technicians in your area, offering convenience and expertise. Regular servicing extends your machine’s lifespan.
Recommended Books and Websites
Expand your sewing knowledge with dedicated resources! Numerous books cover sewing techniques, pattern making, and machine maintenance, offering in-depth guidance for all skill levels. Websites like YouTube provide a wealth of free tutorials and demonstrations, visually illustrating complex processes.
Explore online forums and communities for peer support and advice. Dedicated sewing blogs offer project ideas, tips, and reviews of sewing machines and accessories, fostering continuous learning.