The Chef’sChoice 110 expertly sharpens knives, utilizing diamond abrasives for precision. This sharpener restores a keen edge, offering ease and speed for culinary enthusiasts.
What is the Chef’sChoice 110?
The Chef’sChoice 110 Diamond Hone Knife Sharpener is a highly-regarded, electric knife sharpening system designed for home use. It’s celebrated for its ability to quickly and easily restore a razor-sharp edge to a wide variety of knives. Unlike traditional sharpening methods that require skill and practice, the 110 utilizes diamond abrasives and pre-set angle guides, making it user-friendly even for beginners.
This model employs a three-stage sharpening process – coarse, medium, and fine – to not only sharpen but also hone and polish the blade. It’s particularly effective on stainless steel knives, and can handle both 15-degree and 20-degree edge angles, accommodating both American and European style blades. The Chef’sChoice 110 aims to deliver professional-quality sharpening results in the convenience of your kitchen.
Key Features and Benefits
The Chef’sChoice 110 boasts several key features. Its diamond abrasives ensure long-lasting sharpness and durability, outperforming many conventional sharpeners. The pre-set 15° and 20° angle guides simplify the sharpening process, eliminating guesswork and ensuring consistent results. The three-stage system – coarse, medium, and fine – provides a comprehensive sharpening solution, from repairing dull edges to polishing for a refined finish.
Benefits include significantly improved cutting performance, enhanced kitchen safety, and extended knife lifespan. It’s incredibly easy to use, requiring minimal skill or effort. The compact design saves counter space, and the electric operation offers speed and convenience. Ultimately, the Chef’sChoice 110 delivers professional-quality sharpening at home, saving time and money.

Understanding the Components
The Chef’sChoice 110 features diamond abrasives, precise angle guides, and a three-stage slot configuration, working harmoniously to restore and maintain optimal blade sharpness.
Diamond Abrasives – Coarse, Medium, and Fine
The Chef’sChoice 110 utilizes diamond abrasives in three distinct stages, each serving a crucial role in the sharpening process. The coarse stage rapidly removes metal, reshaping a dull or damaged edge. Subsequently, the medium stage refines the edge, preparing it for the final honing. Finally, the fine stage polishes the blade to a razor-sharp finish, ensuring optimal cutting performance and longevity.
These diamond abrasives are significantly harder than traditional steel sharpening tools, providing superior sharpening power and durability. The progression from coarse to fine ensures a smooth, consistent edge without excessive metal removal, preserving the knife’s overall lifespan. Regular use of all three stages maintains a professional-quality edge on your knives.
Angle Guides – 15 and 20 Degree Settings
The Chef’sChoice 110 features pre-set angle guides, simplifying the sharpening process and ensuring consistent results. It offers two primary sharpening angles: 15 degrees and 20 degrees; The 15-degree angle is ideal for high-performance cutlery, such as chef’s knives and Japanese-style blades, creating a very sharp, albeit more delicate, edge.
Conversely, the 20-degree angle is better suited for heavier-duty knives like hunting, camping, or thicker kitchen knives, providing a more robust and durable edge. Selecting the correct angle is crucial for optimal performance and longevity. The built-in guides eliminate guesswork, allowing even novice users to achieve professional-quality sharpening with ease and confidence.
Slot Configuration – Stage 1, Stage 2, and Stage 3
The Chef’sChoice 110 employs a three-stage sharpening process, each represented by a dedicated slot. Stage 1 utilizes coarse diamond abrasives to quickly remove metal and reshape a dull or damaged edge. This stage is for significant sharpening needs. Stage 2, featuring medium abrasives, refines the edge created in Stage 1, preparing it for the final honing.
Finally, Stage 3 employs fine diamond abrasives to polish and hone the blade to a razor-sharp finish. This stage removes any remaining burrs and creates a smooth, long-lasting edge. Following the stages sequentially is vital for achieving optimal sharpness and maintaining the knife’s integrity. Each slot is clearly labeled for easy identification.

Preparing to Sharpen
Before sharpening, ensure your knife is clean and free of debris. Confirm blade compatibility and inspect for damage; safety is paramount during operation.
Knife Compatibility – Types of Blades
The Chef’sChoice 110 is remarkably versatile, accommodating a wide array of knife types. It excels with straight-edge knives, including those found in typical kitchen sets – chef’s knives, paring knives, and utility blades. However, it’s specifically designed for knives with a 20-degree edge, which is common for many Western-style knives.

While it can sharpen some knives with a 15-degree edge, results may vary, and it’s best suited for the 20-degree profile. Serrated knives are generally not recommended for sharpening with this model; attempting to do so could damage both the knife and the sharpener. The 110 is not intended for use with ceramic knives either, as these require specialized sharpening methods. Always check your knife’s edge angle before use to ensure compatibility and optimal results.

Checking Blade Condition Before Sharpening
Before using the Chef’sChoice 110, assess your knife’s current condition. A simple paper test is effective: try slicing through a piece of paper. A sharp knife will cleanly cut, while a dull one will tear or struggle. Visually inspect the blade’s edge for nicks, chips, or significant dullness. Minor imperfections can be addressed by the sharpener, but severely damaged blades may require professional repair.
Feel the edge cautiously with your thumb (away from the sharp side!). A dull edge will feel rounded or blunt. Note any areas of excessive wear. Understanding the blade’s condition helps determine the appropriate sharpening approach; Heavily damaged blades may require more passes through the coarse stage, while lightly used knives may only need the fine honing stage for restoration.
Safety Precautions
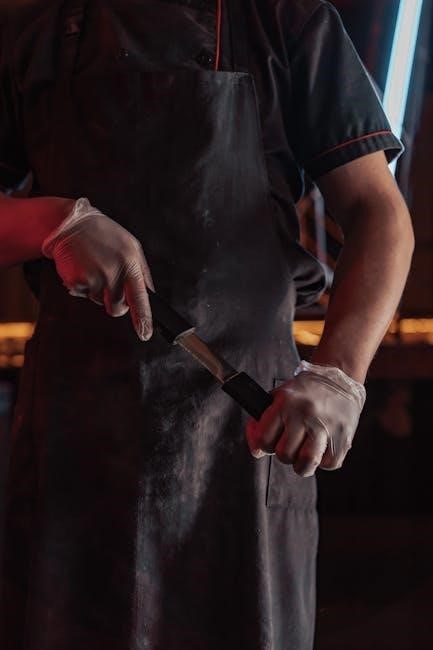
Prioritize safety when operating the Chef’sChoice 110. Always unplug the sharpener before cleaning or maintenance. Never attempt to sharpen ceramic or serrated knives (unless specifically designed for them – see advanced techniques). Maintain a firm grip on the sharpener and the knife during the sharpening process, ensuring stability.
Keep fingers clear of the diamond abrasives; they are extremely sharp. Avoid applying excessive pressure, letting the sharpener do the work. Do not modify or disassemble the unit. Store the sharpener out of reach of children. If the power cord is damaged, discontinue use immediately. Regularly inspect the unit for any signs of wear or damage. Following these precautions will ensure safe and effective knife sharpening.
Sharpening Instructions – Step-by-Step
Begin with Stage 1, then proceed through Stages 2 and 3, utilizing each slot sequentially for optimal sharpening and a polished, razor-sharp edge.
Stage 1: Coarse Sharpening
Stage 1 of the Chef’sChoice 110 utilizes coarse diamond abrasives to rapidly restore a dull edge. This stage is crucial for knives that haven’t been sharpened in a while or have significant damage. Insert the blade into the slot, ensuring the heel makes initial contact.
Maintain light pressure and draw the blade through the slot from heel to tip, repeating this motion 4-6 times. It’s vital to use a consistent angle and avoid pressing too hard, letting the sharpener do the work. After several passes, flip the knife and repeat the process on the other side, maintaining the same number of pulls. This ensures even sharpening and a balanced edge. Remember, this stage focuses on reshaping, not polishing.
Stage 2: Medium Sharpening
Stage 2 employs medium diamond abrasives to refine the edge created in Stage 1. This stage removes the scratches left by the coarse abrasives and begins to create a sharper, more defined cutting surface. Continue using light pressure and the same heel-to-tip drawing motion as before.
Repeat the process 4-6 times per side, ensuring consistent contact with the diamond abrasives. Maintaining a steady rhythm and angle is key to achieving a uniform edge. Observe the blade; you should notice a visible improvement in sharpness. This stage is about refining the shape and preparing the edge for the final honing. Avoid excessive force, allowing the sharpener to effectively remove material.
Stage 3: Fine Honing & Polishing
Stage 3 utilizes the fine diamond abrasives to hone and polish the blade edge, achieving maximum sharpness and a refined finish. Employ very light pressure – almost no pressure at all – and continue the heel-to-tip drawing motion. Repeat the process 4-6 times per side, focusing on smoothing and aligning the microscopic teeth of the blade.
This stage doesn’t remove significant material; instead, it polishes the edge for optimal cutting performance. You’ll feel a difference in the blade’s smoothness. Test the sharpness carefully on a piece of paper – it should slice cleanly. This final honing step is crucial for creating a truly razor-sharp and durable edge, ready for precise culinary tasks.
Advanced Techniques
For serrated knives, gently follow the contours; damaged blades may require multiple passes through Stage 1, then proceed with Stages 2 and 3.
Sharpening Serrated Knives (If Applicable)
Sharpening serrated knives with the Chef’sChoice 110 requires a slightly different approach than standard blades. Unlike smooth-edge knives, serrations don’t require a full edge alignment. Instead, focus on refining the existing serrations. Gently draw the knife blade through each stage – Stage 1, Stage 2, and Stage 3 – maintaining a consistent, light pressure.
Avoid applying excessive force, as this can damage the delicate serrations. Follow the curve of each serration, rather than a sweeping motion. Multiple passes may be needed to achieve the desired sharpness. Remember, the goal isn’t to create a new edge, but to restore and refine the existing one. Patience and a delicate touch are key to successfully sharpening serrated knives with this system;
Repairing Damaged Blades
Addressing damaged blades with the Chef’sChoice 110 often begins with Stage 1, the coarse sharpening stage. This stage removes significant metal to reshape the blade’s edge, tackling chips or significant dullness. Employ consistent, gentle pressure, and multiple passes are crucial for noticeable improvement.
However, severely damaged blades – those with large chips or significant warping – may require professional sharpening before using the 110. The 110 excels at refining and maintaining edges, but isn’t designed for extensive repair work. After Stage 1, proceed through Stages 2 and 3 to refine the newly formed edge, achieving optimal sharpness and polish. Monitor progress carefully, avoiding over-sharpening.
Maintenance and Care
Regular cleaning with a damp cloth ensures optimal performance. Periodically inspect and replace diamond abrasives when sharpening effectiveness diminishes, maintaining peak results.
Cleaning the Sharpener
Maintaining cleanliness is crucial for the longevity and performance of your Chef’sChoice 110. After each use, or regularly with frequent sharpening, unplug the unit and allow it to cool completely. Use a slightly damp, non-abrasive cloth to wipe down the exterior surfaces, removing any metal filings or residue.
Avoid using harsh chemicals or abrasive cleaners, as these can damage the plastic components. For stubborn residue within the sharpening slots, a soft brush can be used to gently dislodge particles. Ensure the slots are completely dry before resuming use. Do not immerse the sharpener in water or any other liquid. Proper cleaning ensures consistent sharpening results and prevents potential damage to your valuable knives.
Replacing Diamond Abrasives
Diamond abrasives will eventually wear down with use, impacting sharpening performance. The Chef’sChoice 110 utilizes replaceable diamond discs. To replace them, first unplug the unit and carefully remove the slot fingers. Gently lift out the old diamond disc and align the new one, ensuring the correct orientation as indicated in the manual.
Securely snap the new disc into place. Reattach the slot fingers. Replacement frequency depends on usage, but noticeable dulling of sharpening results signals the need for new abrasives. Chef’sChoice offers replacement kits specifically designed for the 110 model. Regularly replacing the abrasives guarantees optimal sharpening and extends the life of your knives, maintaining a professional edge.
Troubleshooting Common Issues
If sharpening fails, ensure proper technique and clean abrasives. Uneven results may indicate inconsistent pressure or blade angle during the sharpening process.
Knife Not Sharpening Effectively
Several factors can contribute to ineffective sharpening with the Chef’sChoice 110. First, verify the diamond abrasives are clean and free of metal filings; accumulated debris hinders the sharpening process. Ensure you’re applying consistent, moderate pressure throughout each stage – too little won’t engage the abrasives, while excessive force can damage the blade.
Confirm the correct sharpening stage is being used for the blade’s condition; starting with a coarser stage is crucial for dull or damaged knives. Also, double-check that the knife is fully inserted into each slot and drawn through smoothly, maintaining a consistent angle. If the issue persists, inspect the blade for significant damage like chips, which may require professional repair before sharpening.
Uneven Sharpening
Uneven sharpening often stems from inconsistent technique when drawing the knife through the slots. Maintaining a uniform angle and pressure across the entire blade length is paramount. Avoid rocking or twisting the knife during each pass; a smooth, straight motion ensures even abrasion.
Also, ensure the knife’s heel and tip fully engage with the diamond abrasives in each stage. If one section of the blade isn’t contacting the sharpening surface, it won’t receive adequate honing. Regularly inspect the blade’s edge after each stage to identify areas needing further attention. Consistent practice and mindful technique are key to achieving a perfectly even, razor-sharp edge with the Chef’sChoice 110.
Warranty Information
EdgeCraft Corporation, the manufacturer of Chef’sChoice sharpeners, provides a three-year limited warranty against defects in materials and workmanship from the date of original purchase. This warranty covers mechanical and electrical defects under normal household use. It does not cover damage resulting from misuse, accidents, alterations, or commercial use.
To make a warranty claim, contact EdgeCraft Customer Service with proof of purchase. They may request you return the sharpener for inspection. The warranty does not cover diamond abrasives, which are considered wear items. Retain your purchase receipt as proof of date for any potential warranty service. Visit the EdgeCraft website for complete warranty details and contact information.