Welcome! This comprehensive guide unlocks your G-Shock’s potential, offering detailed instructions for operation, maintenance, and resolving common issues, starting today, 12/19/2025.
What Makes G-Shock Watches Unique?
Unrivaled Durability: G-Shock watches are renowned for their exceptional resistance to shock, water, and extreme temperatures – a legacy born from a quest for a timepiece that could withstand any condition. This robustness stems from a unique “shock-absorbing” construction, featuring a floating module within the case.
Innovative Design: Beyond toughness, G-Shocks boast a distinctive, often bold aesthetic. Their complex resin cases and button configurations aren’t just for looks; they contribute to the watch’s protective qualities.
Feature-Rich Functionality: These watches aren’t simply durable; they’re packed with features. From atomic timekeeping and GPS capabilities to multiple alarms and comprehensive timers, G-Shocks offer a surprising level of functionality for an everyday watch. This manual will guide you through utilizing these features effectively.
Brief History of the G-Shock Brand
The “Toughness” Project: The G-Shock story began in 1983 with a Casio engineer, Kikuo Ibe, and his team’s ambitious goal: to create an incredibly durable watch. Frustrated with the fragility of existing timepieces, Ibe envisioned a watch that could survive a drop – a “shock-resistant” watch.
The First Model – DW-5600C: After numerous prototypes and rigorous testing (including a deliberately destructive 10-meter drop test!), the DW-5600C was released. Its bulky resin case and innovative internal suspension system revolutionized the watch industry.
Evolution and Expansion: From its humble beginnings, G-Shock has evolved into a global icon, constantly innovating with new materials, technologies, and designs. Today, the brand offers a vast range of models, catering to diverse tastes and needs, all built upon the foundation of unwavering toughness. This guide will help you master your specific model.
Understanding Your G-Shock Model
Locate your model number for specific instructions; G-Shock offers diverse features, and this manual provides a complete overview for optimal usage.
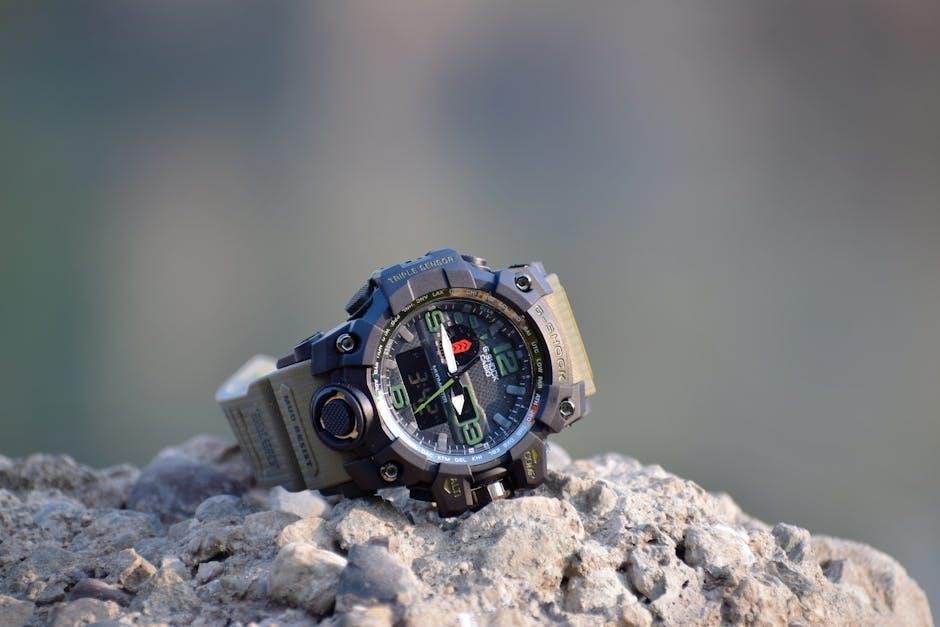
Identifying Your Specific G-Shock Model Number
Finding your G-Shock’s model number is crucial for accessing the correct, detailed instructions and support resources. The model number is typically located in several places on your watch. First, check the watch face itself – often, it’s printed near the 6 o’clock position or below the display.
Alternatively, the model number is usually found on the case back, the part of the watch that rests against your wrist. You may need to remove the watch band to clearly view this information. It’s a series of letters and numbers, like “DW-5600E-1V” or “GA-100-1A1”.
Why is this important? Different G-Shock models have varying functionalities and features. Knowing your specific model ensures you’re consulting the right documentation for accurate guidance on operation, troubleshooting, and maximizing your watch’s capabilities. Referencing the wrong manual could lead to incorrect settings or missed features.
Key Features Common to Most G-Shock Models
G-Shock watches are renowned for their durability and functionality. Several key features are consistently found across most models, defining the brand’s reputation. Shock Resistance is paramount, protecting against impacts and vibrations – the core of the G-Shock design.
Water Resistance is another standard, typically rated to at least 200 meters, suitable for swimming and water sports. Most G-Shocks also include a Digital Display with features like a stopwatch, timer, and alarm.
Multiple Time Zones and a robust Quartz Movement for accuracy are also prevalent. Furthermore, many models boast an LED Backlight for visibility in low-light conditions. These features, combined with a rugged build, make G-Shock watches ideal for active lifestyles and demanding environments.

Basic Operation & Time Setting
Mastering the basics is key! This section details how to navigate your G-Shock’s functions and accurately set the time and date for reliable performance.
Setting the Time and Date
Initial Time & Date Configuration: Begin by ensuring your G-Shock is in Time Setting Mode. Typically, this involves pressing and holding the ‘Adjust’ or ‘Mode’ button until the digits representing hours begin to flash. Use the ‘Start/Stop’ or ‘Forward’ buttons to adjust the hours, and the ‘Light’ or ‘Back’ button to cycle through the settings – minutes, days, months, and year.
Remember to confirm each setting by pressing the ‘Adjust’ or ‘Mode’ button again. Pay close attention to the AM/PM indicator when setting the hour. For accurate date setting, consider the current date and ensure the year is correctly inputted. Once all settings are confirmed, the watch will return to normal timekeeping mode, displaying the accurately set time and date. Refer to your specific model’s manual for any variations in button functions.
Using the Mode Button – Navigating Functions
Mastering the Mode Button: The ‘Mode’ button is your primary tool for accessing all of your G-Shock’s features. Each press cycles through the available functions – Timekeeping, Alarm, Stopwatch, Timer, and World Time, among others. Observe the display carefully; the currently selected function is usually indicated by an icon or text label.
Pressing ‘Mode’ repeatedly allows you to scroll through these options. Once you’ve reached the desired function, press ‘Adjust’ or ‘Start’ to enter that mode and begin using its specific features. Remember that the exact sequence and available functions vary by model, so consulting your manual is crucial for optimal navigation and understanding. This button unlocks the full potential of your G-Shock.

Advanced Functions & Features
Explore further! Unlock stopwatch, world time, alarm, and timer capabilities, enhancing your G-Shock experience with its diverse and powerful functionalities.
Stopwatch Functionality

Accessing the Stopwatch: Begin by pressing the ‘Mode’ button until you reach the stopwatch screen. The display will initially show ‘0.00’ indicating readiness. Pressing ‘Start’ initiates the timing sequence, displaying elapsed time in seconds and hundredths of a second.
Lap Timing: To record lap times, press the ‘Lap’ button while the stopwatch is running. The display will briefly show the lap number and elapsed time, then revert to the ongoing time. You can recall and view up to 30 lap times.
Stopping and Resetting: Press ‘Stop’ to pause the timing. Press ‘Reset’ to return the stopwatch to zero, clearing all recorded lap times. Utilizing these functions provides precise timing for athletic activities or other timed events, maximizing your G-Shock’s utility.
World Time Settings
Accessing World Time Mode: Press the ‘Mode’ button repeatedly until you reach the ‘World Time’ display. The top line shows ‘WRLD’, indicating you’re in World Time mode. Initially, the city code displayed might not match your current location.
Selecting a City: Press ‘Adjust’ to enter city code selection. Use the ‘Up’ and ‘Down’ buttons to scroll through available city codes representing different time zones. Once your desired city appears, press ‘Adjust’ again to confirm.
Switching Between Times: Press ‘Mode’ to toggle between the current time and the selected World Time. This allows quick reference to times in other locations. Remember to consult a current list of city codes for accurate settings.

Alarm Settings & Usage
Entering Alarm Mode: Press the ‘Mode’ button until you reach the ‘Alarm’ display, indicated by an alarm icon. G-Shock watches typically offer multiple independent alarms (AL1, AL2, AL3, etc.).
Setting the Alarm Time: Press ‘Adjust’ to select the alarm you wish to set. Then, hold ‘Adjust’ again to enter time setting mode. Use the ‘Up’ and ‘Down’ buttons to adjust the hour, and press ‘Adjust’ to move to minutes. Repeat for seconds if applicable.
Alarm On/Off & Snooze: Toggle the alarm on or off using the ‘Up’ or ‘Down’ buttons after setting. When the alarm sounds, press any button to stop it, or allow it to snooze for a few minutes.
Timer/Countdown Function
Accessing Timer Mode: Navigate to ‘Timer’ mode by repeatedly pressing the ‘Mode’ button until the timer icon appears. This function allows you to set a countdown from a specified time.
Setting the Countdown Time: Press ‘Adjust’ to enter setting mode. Use the ‘Up’ and ‘Down’ buttons to adjust the countdown time in minutes and seconds. Confirm each setting by pressing ‘Adjust’ again.
Starting & Pausing the Timer: Press ‘Start/Stop’ to initiate the countdown. Pressing it again pauses the timer. Press ‘Reset’ to return to the initial setup. The watch will beep when the countdown reaches zero.
Caring for Your G-Shock Watch
Preserve longevity! Regularly clean your G-Shock, understand its battery life, and be aware of its water resistance capabilities for optimal performance.

Cleaning and Maintenance
Keeping your G-Shock pristine requires simple, regular care. To clean the resin case and band, use mild soap and warm water. Avoid harsh chemicals or solvents, as these can damage the materials. A soft-bristled brush can help remove dirt from crevices.
Rinse thoroughly and dry with a soft cloth. For the crystal (glass or acrylic), a gentle wipe with a damp cloth is usually sufficient. Avoid abrasive cleaners that could scratch the surface. Regularly inspect the case back and button seals for any signs of damage or deterioration.
Proper maintenance extends the life of your G-Shock and ensures its continued reliability. Remember, a clean watch functions better and looks its best!
Battery Life and Replacement
G-Shock watches are renowned for their impressive battery life, typically lasting several years depending on usage and features. However, eventually, the battery will need replacement; A low battery indicator will appear on the display, signaling it’s time for service.
Do not attempt to replace the battery yourself unless you possess the necessary tools and expertise. Improper handling can compromise the watch’s water resistance and potentially damage internal components. It’s highly recommended to have a qualified watch technician perform the battery replacement.
Professional replacement ensures a proper seal and guarantees continued functionality. Expect to pay a reasonable service fee for this essential maintenance.
Water Resistance Explained
G-Shock watches boast varying degrees of water resistance, crucial for understanding their capabilities. Ratings are typically indicated in meters (e.g., 200m) or atmospheres (ATM). However, these numbers don’t represent actual diving depths.
A 200m rating signifies the watch was tested to withstand 200 meters of static pressure, not dynamic pressure from movement. Generally, 50m is suitable for splashes, 100m for swimming, and 200m+ for water sports.
Regularly inspect the gaskets and seals for damage. Avoid operating buttons underwater, as this can compromise the seal. Rinse your G-Shock with fresh water after saltwater exposure to maintain its longevity and water resistance.
Troubleshooting Common Issues
Facing problems? This section provides solutions for typical G-Shock issues like a non-responsive display or malfunctioning buttons, ensuring optimal performance.
Watch Not Turning On
Initial Checks: If your G-Shock isn’t displaying anything, begin with the simplest solutions. First, ensure the watch hasn’t simply entered a power-saving mode. Press any button – a slight illumination or display flicker confirms it’s responsive. If nothing happens, the battery is the most likely culprit.
Battery Depletion: G-Shocks are renowned for long battery life, but all batteries eventually need replacing. The specific replacement process varies significantly between models. Consult your model’s specific manual (available online via the Casio website using your model number) for detailed instructions.
Reset Attempt: In rare cases, a temporary glitch might cause the display to freeze. Attempt a reset by holding down the ‘Reset’ button (if your model has one) or a combination of buttons as outlined in your manual. If these steps fail, professional servicing may be required.
Button Malfunctions
Initial Assessment: If buttons on your G-Shock are unresponsive or produce unintended actions, a few troubleshooting steps can help. First, ensure the buttons aren’t physically stuck due to dirt or debris. Gently clean around the buttons with a soft, dry cloth.
Reseat the Buttons: Sometimes, a slight misalignment can cause issues. Gently press each button several times, applying even pressure. This might help reseat any slightly dislodged components.
Battery Influence: A low battery can sometimes cause erratic button behavior. If the battery is weak, replacing it often resolves the problem. Refer to your model’s manual for battery replacement instructions. If the issue persists after a battery change, professional repair is recommended.